Monday, January 23, 2012

Using Paint and Reinkers

Well, I thought I was going to make this for a Challenge but, the deadline  came and went. I decided to go ahead and post it anyway. Another technique using the White Acrylix paint that comes in the Distressing Kit- Z1299 and Close To My Heart's Reinkers. Using the re-inkers with the white paint not only guarantees the colors will match my Close To My Heart papers its also a way to save a few pennies by not having to buy all the different colors of paints. The reinkers can be used for alot of different techniques besides reinking your stamp pads. What a great versatile product! 


Reinker Colors I used:


Sunflower
Tulip
Olive
Sorbet
I took a 12x12 piece of Sorbet Cardstock and using a dry embosser I used it to emboss every 3 1/2 in both ways making a total of 9 3 1/2 in squares. I cut off the extra 1 1/2 inch left over.


Flip the embossed cardstock over and using a medium sandpaper, sand all the raised, embossed lines. You can emboss more of the cardstock if you wish for a more distressed look. Take a soft cloth or Kleenex and wipe off the excess debris from sanding. 


Here is a close up of the sanded cardstock.


I used a Styrofoam paper plate so the paint wouldn't soak in. Plop 3 (or more) piles of white paint. Add some reinker to each of these. You have to decide how much. Remember, the white makes it lighter.


I don't mix the reinker into the paint. I like to have the option of the darks and the lights to work with. I used a couple different types of brushes, but, here again, use what is comfortable and does the job. Its your creativity and what works for you the best.


Here I used a bristle brush. It will make more streaky strokes. Hmmmm.....that sounds cute......streaky strokes. 


I brushed color lengthwise and horizontal. It will be different shades because you will pick up white with the dark and the paint will mix with each stroke.


I also used a sponge brush and got a whole different look. It will go on with a more solid look. 


I left background color come through also and stayed inside the embossed lines so each square stayed a square.


I used the following Close To My Heart My Acrylix Stamp Sets:


D1491- Hooray Bouquet
C1408- Live Inspired
D1481- Vintage Type
D1482- Love Life
C1464- Blue Ribbon


These stamp sets are some of my favorites. I stamped several things and used some for the background. One thing bad about trying to stamp on top of the paint is, it doesn't show up as dark so, if you want it to be bold, I would suggest using the Staz-On. 


Here is some close-ups of what I did with the stamps.


This wrinkled piece of cardstock was stamped on first, then, I decided to dampen it and saw the ink start to run. I thought, oh no, is this going to work? I went ahead and wrinkled it up then smoothed it out and let it dry. It is pretty cool how it softened the image and the cardstock dried just like this. Its stiff too, so I just put some pop up dots under it. 


Ta Da......And here's the finished product.


I also made the accompanying LO.


 I painted on the right side to match the other LO and then I stamped on that 1 1/2 inch left over piece that was already embossed and sanded. I also used scrap pieces here and there.


Now, its your turn. Try some paint and reinkers on your project. Post your link to your photos of your project in my Face Book page under this post so I can admire your projects too. Oh, and I love your comments too.
Stampingranny


Sunday, January 15, 2012

CTMH Spotlight Blog Hop


Welcome to my blog. If you are coming here from Luisa, then your on the right path. This blog hop goes in a circle so, if you start here and make the rounds, you will end up here again. 
This Blog Hop is featuring projects used from my scraps. I don't know about all of you, but, I am a collector and have all kinds of scraps of cut paper even from other projects. Below, is the 2 used and out dated Close To My Heart paper packs that I chose some of my B&T from. I decided to go with Blush, Baby Pink, Garnet, Desert Sand, Colonial White, White Daisy, Bamboo, Chocolate, and Garden Green as my color scheme.


I used the stamp set below to stamp on the designs I cut from our Art Philosphy Cricut Cartridge. 


 These are the stamp pads I used to stamp on the above cut pieces. Using the rolling method and stamping on them multiple times.


 Using a sponge and Garden Green ink, I distressed all the edges to give them another color and some depth. I love adding color to things, makes them pop.


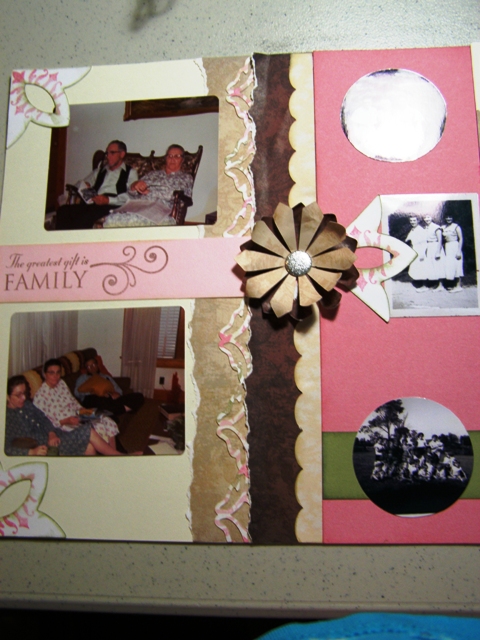
Heres the finished product. A 2 page layout using my scraps. I tore the edges of some pieces, scalloped the border of 2 other pieces using the Art Philosophy Cricut Cartridge, cut and put together 2 layers of flowers again using the Art Philosophy Cartridge.


Just a couple close ups of the pieces that were cut from the Cricut Cartridge and stamped on. 


Well, thats all for now, you can move on to Elizabeth's blogsite from here. I hope you enjoy visiting and getting more new ideas for your projects.

Monday, December 19, 2011

Two More Blog Hops!

Even though I didn't join in these two blog hops please join me as I hop from one blogsite to the next to visit these ladies and view some really fabulous artwork and ideas for the December Stamp of the Month and the new Rock The Block Campaign. 


Let's start here with:


Helen Onulak - check out her amazing creative use of the new Rock The Block cubes! Then, after your done click on the link she has provided to move to the next blog site and so on. 


If you scroll down far enough, she has also participated in the December Stamp of the Month Blog Hop. She has a list of all the participants in this one and the Rock The Block Hop so if you get lost, you can go back to hers and pick up where you left off. Happy Hopping!!!!!


Have any questions or see something you want? Just call, e-mail or message me on Facebook or click on the Shopping Online button to the right and start shopping. 
Be sure and check the shopping online and click on the While supplies last button. There are some amazing sales going on right now!!!!!! For instance, the Sweetheart Paper Pack and My Stickease is marked down 77% and 60%!!! 

Adeline Brill shows a project she made for the December Blog Hop using the Sweetheart Paper Pack for her show and tell.


 Lots of 8 1/2x 11 cardstock Combo packs on sale. Once they are gone, they are gone for good, so get yours today.


And lots of Embellishments for that Scrapbooker on your list.


Rock The Block Campaign!

Rock The Block Campaign starts today Dec. 19, 2011 and ends Jan. 31,2012! Just place a minimum order of $25 from the Autumn/Winter 2011 Idea Book, you can get two valuable new products for just $15: the My Creations® Collage Cubes (a Spring/Summer 2012 sneak-peek product!) and the exclusive My Acrylix® Rock the Block E-size stamp set shown below and available only during this promotion. This Rock the Block promotion represents a retail savings of almost $30! You're going to love the collage cubes and the Rock the Block stamp set, which work together for interactive, fashionable fun!


When you order online at my website, the option to order this campaign will pop up automatically when you finish putting in your $25 minimum order. Click below today for more information and to start shopping. Or you can call or e-mail me your order and I will do it for you. All my contact info is on my website. 


Shop On My Website!

Thursday, December 15, 2011

Virtual Holiday Card Exchange

This card was made for a workshop that never happened but I will submit it here for this challenge. First, the list of product used:


Believe Level 2 Paper Pack (X7145B)
Cricut Art Philosophy Collection (Z1686)
Snow Flurries My Acrylix Stamp Set (D1384)
Glory To God My Acrylix Stamp Set (D1483)
Glitz Glitter Gel (Silver) (Z1482)


I cut the snowflake from the Cricut Cartridge and used the center piece for the extra snowflake at the top. I cut the solid back and the top layer from 2 different colors of cardstock then, filled in the holes with the Glitz Glitter Gel. Attach it with the 3-D foam tape. Simple card to make. 


Heart 2 Heart Challenges- click on this link to see other blogs and more ideas for Christmas Cards.

December CTMH Spotlight Blog Hop!

The CTMH Spotlight Blog Hop starts today! I am just one of many other ladies participating. If you came here from  Haley then your on the right track. Or you can start here and click on the next one below and you will follow the blogs in a circle until you come back here. 


This month's Blog Hop is featuring our beautiful My Stickease. The one I chose is the Roxie My Stickease (X7140C) and it matches the Roxie Level 2 Paper Pack (X7140B) that I also used for the card. You will get two sheets of cardstock weight self-sticking stickers. Wow, that almost ties up my tongue.


 These are some of the different parts. Above is the banner that I attached to a piece of the Roxie B&T that is mostly the Desert Sand color. I cut around the outside of the sticker leaving a tiny edge of color showing. Now that our B&T is cardstock weight and the stickease is cardstock weight, the double layers give this piece stability so I could roll it around a pen to give it this rounded out effect.


I put Liquid Glass on these corner stickers and added them to the 3x3 piece of B&T. It really gives this square of paper a different look, don't you think?
 This next photo is showing a larger sticker that I used for the main focal point. I attached it to a piece of the same Desert Sand B&T and cut around the stamp leaving an edge of color showing all the way around to make it pop off the background. I used a black heart sticker like the one I am holding in front and added it to the heart on the big sticker. Then, I added some Liquid Glass to the inside of the line making it puff out. 

 These flowers were cut from our new Art Philosophy Cricut Cartridge on page 21. I cut them at 2",1 1/2" and 1 1/4" out of Tulip cardstock. I actually only used 3 but wanted to show you what they looked like before I added the Liquid Glass and the glitter. Pizzazz!!!!!


Here is the finished product! Kind of a collage look. The background is cut from Sorbet cardstock. The centers of the flowers are My Stickease with self sticking pearls in the centers. I stacked about 3 of our 3-D foam tape in the center of the banner to keep the rounded look. This card was made from the pattern in the Wishes Card Program book and I used the Delightful Dots pattern on page 53 tweaking a few things of course.

 Thanks so much for looking and visiting me today. I hope this will inspire you to try making a card using My Stickease for yourself and see how fast and easy it is. Now, move on to the next blog, Melinda and get more great ideas. 


I will put everyone's name in a pot that comments on this blog and the lucky winner will win this card. 


Tuesday, October 11, 2011

http://www.jeanettelynton.com/2011/10/shape-day-day-11.html

Check out Jeanette's blog for a really gorgeous 2 page layout using some of our chipboard and our new cricut cartridge!

Saturday, September 3, 2011

September Scrapbook Workshop

 Make 2 beautiful 2 page layouts! (See page 25 of the Fall/Winter Idea Book for the other layout design.)


You can either order the Workshop On the Go kit for $29.95
or just the Roxie Level 2 Paper Pack for $9.95
Note: There will be a shipping and tax charge added to these prices. 


The Workshop On the Go Kit comes with:

  • Roxie Level 2 Paper Pack
  • My Acrylix Roxie Workshop Stamp Set
  • 1 Bling Assortment
  • 1 Black Hemp
  • An Instructional Brochure
For those just wanting to purchase the Roxie Level 2 paper pack. You will have access to my stamp set and stamps. If you want embellishments, feel free to add them to your purchase.

At the Workshop we will cut, stamp and put together the basic 2 page layout following the instructional brochure. 
Please bring your basic scrapbook kit:

  1.  a trimmer capable of cutting 12x12 paper
  2. craft scissors
  3. adhesives. (I have adhesives here to buy if you need them). 
Those who purchase the Workshop On the Go Kit might might want to consider purchasing your own blocks to fit the stamp set and stamp pads. I have included a list of suggested product below:


Required Tools

ITEM #PRODUCT
PRICE
D1296My Acrylix® Chocolate Alphabet Small
$17.95
Z2105Black Exclusive Inks® Pad
$5.25
Z2118Desert Sand Exclusive Inks® Pad
$5.25
Z2166Tulip Exclusive Inks® Pad
$5.25
Z697Sponge
$1.25
Z341Memory Book Mini Glue Dots®
$7.50
Z11513-D Foam Tape
$5.95
Y10001" × 1" My Acrylix® Block
$3.95
Y10032" × 2" My Acrylix® Block
$6.50
Y10092" × 3 1/2" My Acrylix® Block
$7.50


I will have the chocolate alphabet on hand to use. Also, I will have extra Colonial White cardstock and each person will need 2 sheets (.98) to finish your layouts at an additional cost. This also includes the ladies purchasing just the Roxie Level 2 paper pack. 


Come and join us for a fun eve where you will finish 2-2page layouts to take home. Feel free to bring your photos and bring your friends, too.
Note: Our layout designs will fit Creative Memories pages!