Reinker Colors I used:
Sunflower
Tulip
Olive
Sorbet
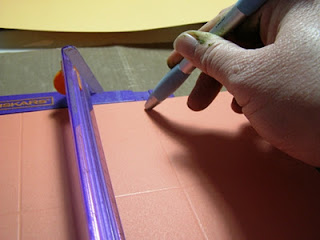
I took a 12x12 piece of Sorbet Cardstock and using a dry embosser I used it to emboss every 3 1/2 in both ways making a total of 9 3 1/2 in squares. I cut off the extra 1 1/2 inch left over.
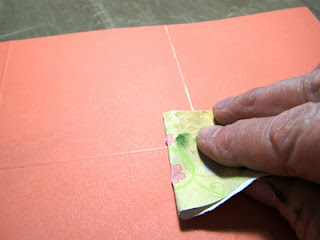
Flip the embossed cardstock over and using a medium sandpaper, sand all the raised, embossed lines. You can emboss more of the cardstock if you wish for a more distressed look. Take a soft cloth or Kleenex and wipe off the excess debris from sanding.
Here is a close up of the sanded cardstock.
I used a Styrofoam paper plate so the paint wouldn't soak in. Plop 3 (or more) piles of white paint. Add some reinker to each of these. You have to decide how much. Remember, the white makes it lighter.
Here I used a bristle brush. It will make more streaky strokes. Hmmmm.....that sounds cute......streaky strokes.
I brushed color lengthwise and horizontal. It will be different shades because you will pick up white with the dark and the paint will mix with each stroke.
I also used a sponge brush and got a whole different look. It will go on with a more solid look.
I left background color come through also and stayed inside the embossed lines so each square stayed a square.
I used the following Close To My Heart My Acrylix Stamp Sets:
D1491- Hooray Bouquet
C1408- Live Inspired
D1481- Vintage Type
D1482- Love Life
C1464- Blue Ribbon
These stamp sets are some of my favorites. I stamped several things and used some for the background. One thing bad about trying to stamp on top of the paint is, it doesn't show up as dark so, if you want it to be bold, I would suggest using the Staz-On.
Here is some close-ups of what I did with the stamps.
This wrinkled piece of cardstock was stamped on first, then, I decided to dampen it and saw the ink start to run. I thought, oh no, is this going to work? I went ahead and wrinkled it up then smoothed it out and let it dry. It is pretty cool how it softened the image and the cardstock dried just like this. Its stiff too, so I just put some pop up dots under it.
Ta Da......And here's the finished product.
I also made the accompanying LO.
I painted on the right side to match the other LO and then I stamped on that 1 1/2 inch left over piece that was already embossed and sanded. I also used scrap pieces here and there.
Now, its your turn. Try some paint and reinkers on your project. Post your link to your photos of your project in my Face Book page under this post so I can admire your projects too. Oh, and I love your comments too.
Stampingranny


1 comment:
Love the tecnique. I just started messing with reinkers and already think I'm going to need more!! lol
Post a Comment