Sunday, April 3, 2022

April Stamp of the Month Card Kit- Message in A Bottle

 I love, love, love this stamp set! I had so much fun using this stamp set to design these cards for you...

I used the D2081- In Full Bloom scrapbooking stamp set for the flowers 
and the Z4095-Botanical Embossing Folder to add texture. 
I used papers and the colors from the X7279B In Full Bloom Paper Pack. 
and the X7279C-Coordinating Cardstock.


These three pre-cut card kits will be shipped to you FREE, when you get the April Stamp of the Month stamp set. Click on the tab above to see the differnt ways to get your April Stamp of the Month...


Friday, April 1, 2022

April Color of the Month- Lagoon

 It's April 1st and April Fool's Day! How many of you woke up to snow this morning? LOL! We did and I love my Creator's sense of humor, don't you? He's saying, "Hello, I am still in charge here!" 

Lagoon is the color this month. I used the In Full Bloom paper and Lagoon is one of the colors in this paper pack. It was a hard toss-up between that and the Avocado which I am really loving!


Aren't these bunnies just the cutest? I haven't decided what sentiment to use on it yet, I don't plan to make it an Easter one. But, you can make it what you want to.
I colored the bunnies, flower and the greenery with alcohol markers. Doodled a bit with the White Gel pen. You can barely see the wooden button to the left of the flower, it was colored with alcohol ink also.

The Avocado piece is run through the embossing machine using the 
Z4095- Botanical Embossing Folder. 
I also used 
Z3960- Doodled Florals for the flower and the greenery. 

Would you like this Color of the Month Kit? 
You can Private Message me or comment below and let me know you want it. Click the tab above for all the information.

*Note- My VIPs have special instructions.

Monday, March 14, 2022

March Stamp of the Month Stamp set and Card Kits

 S2203- Your The G.O.A.T.

Well, I had to look up what G.O.A.T. means. Who already knew?

Greatest Of All Time!

I guess I am never too old to learn new things. LOL!  

Anyway, this stamp set is really cute and paired with the March Paper Kit of the Month-Cake Day, it really enhances the cuteness. 

The colors of this paper are so beautiful! I can't stop looking at them. Sorry, did I not tell you I love colors? I really love the color combinations Close To My Heart puts together for these kits. So, if your looking for bright spring colors, this paper pack fits the bill!


I used the: 

D2080- Cake Day Scrapbooking Stamp set or

                  Z4416- Cake Day Scrapbooking Stamp set + Thin Cuts 

on the cards to make them for Birthday Cards. You will need to purchase this stamp set to finish the cards like mine but, you are always welcome to use what you have! When you purchase the Stamp of the Month (remember VIPs get them FREE with a $50 order), I will send you this kit of these 3 cards precut and with cutting/assembling diagrams and instructions. Plus, you will be added to my workshop Facebook group for video instructions on assembling these cards. 

I do need to insert here that I am behind on the videos because of events but, I will get them done very soon. 

If you live close, I am doing them at the N. Manchester, on the Craft Days. 

March 19 will be the next Craft Day! 

Private Message me for more information if you are interested in the Craft Day.

 Please, check the list below to be sure you have what you need to finish these. 

I do let people use my inks at the Craft Day if you have pre-purchased the stamp set. 

Please plan to furnish your own adhesives, and 3- D Foam Dots or 3-D Foam Tape. 

Another item I used, which is part of the Color of the Month Kit, is the Green Apple Shimmer Brush. Click on the tab above for more information. Here are the close ups of the cards. I used the thin cuts from the Cake Day stamp set to cut the holes in Card #2. I colored the background with Oxide Inks.


Card #1


Card #2


Card #3

Colors used for stamping:

Z2805-Black

Z6527- Wild Berry

Z2841- Glacier

Z6517- Lemonade

Z6521-Sundance

Distress Oxide Inks-

Z3833- Peacock Feathers

Z3832- Mowed Lawn

Other Items used:

Z2045- All Purpose Mat

Z1151- Thin Foam Tape

Z1836- Non-Stick Micro-Tip Scissors

Z3672-Green Apple Shimmer Brush

Z3517- Black Journaling Pen

Y1016 My Acrylic Blocks (1" x 1 1/2")

Y1002 My Acrylic Blocks (1" x 3 1/2")

Y1003 My Acrylic Blocks (2" x 2")

Z3579-Stamp Shammy

X254- White Cards and Envelopes Value Pack

Z3225 Medium Round Waterbrush


Thursday, February 17, 2022

Basic Scrapbooking 101- Conservation and Storage

 Scrapbooking is all about preserving memories for generations still to come.  Fortunately, in today's modern world, we have the knowledge and distinctive advantage regarding how to do this properly to keep our photos and memorabilia safe from corrosion.

Remember the old magnetic albums in the 70's? Or that's my first memory anyways. I thought they were the bee's knees. LOL, but boy did they ever ruin my precious pictures. Especially the ones of my kids and everyday life back then. I have been literally digging my photos off of them and scrapbooking them in a better environment. I found out that Undu makes the job easier and doesn't damage them further.. 


The materials in these albums contained chemicals that, with time, break down to form acids. These acids, in turn, begin breaking down your photos. The term for this is acid migration.

Many papers contain lignin, a chemical compound derived from plant matter. In time, lignin will also beak down causing the paper to yellow and become brittle. This process of deterioration causes your photos to be damaged also. 

If you have photos that have been damaged or in danger of deterioration, you can replicate them by scanning or reprinting and making color photocopies on acid-free paper as a temporary solution. Damaged photographs can be restored in many different ways. Professional photo labs provide restoration services for photographs and negatives.

The internet is a good place to go to find new and up to date information for preserving and replicating your old photos. 

So, where do we start with this whole scrapbooking thing?

I would recommend starting with your photos. Are they jumbled in a box? Stored in unfriendly picture albums? 

You can start by sorting through the jumbles in a box and getting those photos out of those unfriendly albums and put them into photo boxes. 

Sorting and storing photos chronologically is a really good starting point. Simply record the year on the front of each box then place the photographs in order. If there are several photos of the same event, in lieu of writing on the back of each one, use a journaling card to record all the information relating to that event. Place that card in front of those photographs.

You can sort by themes, by person, by dates, by events, etc. As you sort, those ideas will come to mind, and it will get easier. You can add journaling cards as it will save time and energy when planning layouts plus, if it takes a while to get to them, it helps later for remembering the event. I thought I would never forget, but now that it's been 40 some years since the beginning of some of our photos, I can't always remember the important information. 

Here is a link to the 8 best storage boxes. Just make sure any box you choose is acid free cardboard. You can also purchase plastic boxes made for photo storage. Store the photos in a cool, dry location to avoid any damage from light and mold. 

Next week: Materials and Equipment


Basic Scrapbooking 101

What in the World do you scrapbook about? 

Many scrapbookers begin with a particular event in mind. Birth of a baby, weddings, graduations, birthdays, anniversary, vacations, starting school, retirement, pets or even the death of a loved one. 

The last few years scrapbooks have done some more evolving. Some people prefer smaller size albums or even books that are more journal type or maybe a more up to date version of a common-place book. They do a lot of more art type decorating along with a lot of journaling and a few photos.

Some have made scrapbooks about themselves and include information like personal collections, recipes, day to day life, food, goals, etc. Just think how this could be great information for the future generations to learn about their ancestors.

The great thing about Scrapbooking is that anyone can do it. The only prerequisites are being able to cut and paste. This craft appeals to all age groups. It can bring families together as they share the highlights and rekindle memories. Children enjoy looking through family scrapbooks, especially books of themselves.

It's a great way to make friends because there are opportunities for gathering together with other "scrappers" and working on your own projects. Sharing tools, ideas and inspiration is a plus at these events. Having the freedom to share your stories in relation to the photos you're working on is very therapeutic and draws people closer together.


Wednesday, February 16, 2022

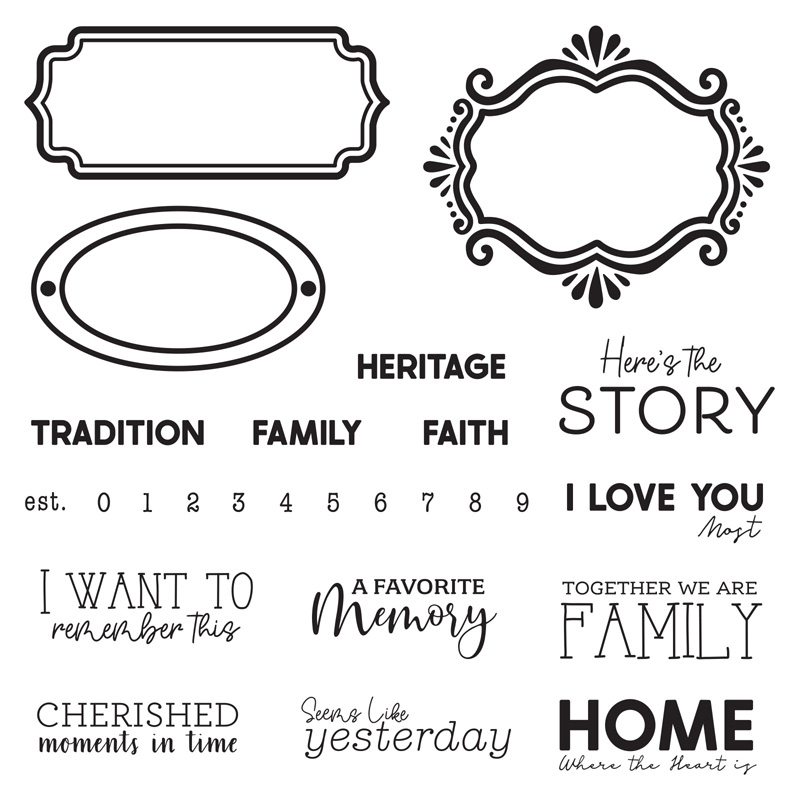
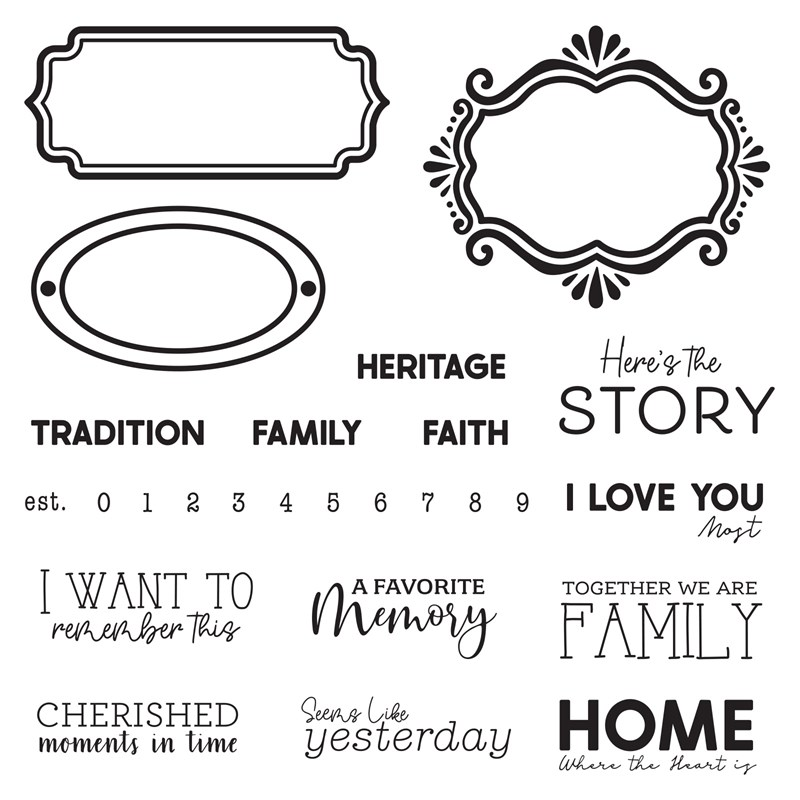
Febuary Stamp of the Month Club- Here's The Story

 Just jumping on here to remind you of the February Stamp of the Month Club!

Aaaaaand, how you can get a FREE card kit when you order this fun and versatile stamp set for your collection. 

First, how can you get it? Three different ways actually.


Each month you can purchase a new D-size stamp set valued at $18.95 for just $5—or you can get it for FREE as a VIP Customer (click here)! Qualify for this special pricing by placing an order of $50 or more in Close To My Heart products. This month’s set is only available February 1–28.

S2202, set of 26

Recommended Blocks: 1″ × 1″ (Y1000), 1″ × 1½″ (Y1016), 1″ × 3½″ (Y1002), 2″ × 3½″ (Y1009), 3″ × 3″ (Y1006)

S2202: Here’s the Story, set of 26


When you choose this stamp set, you will be qualified for the FREE Card Kit which I will send to you.
This pre-cut kit comes with three different designs, and includes the card bases, envelopes, embellishments and the stencils I used. 
Also, it includes the instructions how to do them. and lists of what else you need to finish these cards and how I did them. Your other option will be to finish them how you want to.

You will also be eligible to be a part of my private workshop group on Facebook where I will post the videos or lives that show how to put these cards together and how to do the backgrounds. 

Or, if you live close to me, you can join me at Deb's All Day Craft Day in N. Manchester, IN for a physical workshop with the option of using my inks. 

We meet once a month 10 am to 4 pm. You can contact me for the dates.


Tuesday, February 15, 2022

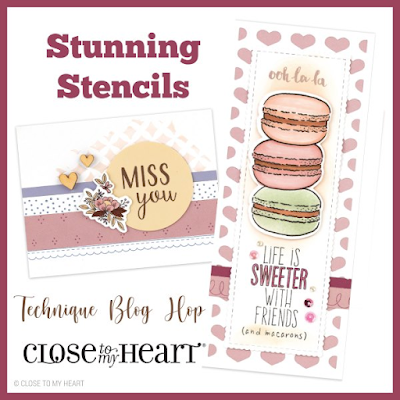
Technique Hop-Stunning Stencils


Welcome to our Technique Blog Hop!  

 Stunning Stencils is the name of the game and this month there are 15 of us highlighting the different ways to use them. This blog hop is a great big circle so you can start wherever you want and continue through to see all the fabulous artwork incorporating this technique. Enjoy!

 If you are coming from Danielle Edwards I Blog, you are on the right track! 

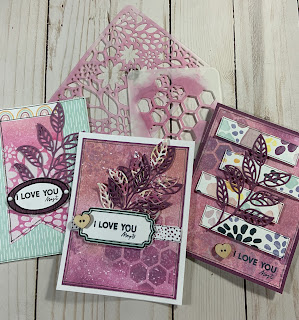
I decided to incorporate the stencil technique with the S2202-February Stamp of the Month- Here's the Story. I was challenged by this stamp set because it seems like it's made for Scrapbooks and Journals, but I was able to come up with three different card designs.

Heres the Story


Using the X7277F Sawyer Digital Art Collection and a stencil sheet we used to carry, I cut my own stencil from the card overlay for my backgrounds.


I left the ink on the two stencils so you can see them better. 


 I blended the following Oxide Inks- 
Z3828Tattered Rose
Z3835Seedless Preserves
Z3837Pumice Stone 
Z3827Picked Rasberry and 
Weathered Wood 
on two of the backgrounds, I blended them together mixing colors and brushing them on the White Daisy cardstock. Spritz with water for a beautiful texture drying with your heat gun. Then, I used the stencil to add the darker Seedless Preserves color blending the color, mixing some other of the colors and adding designs where I wanted them using another stencil I had already cut from the X7276FSweet As Honey Digital Art Collection. I didn't cover the whole thing. 

Spritz with water again and dry with your heat gun. 
Flick White Gloss and let it dry.

The Tag Card I made with the Sawyer stencil and by using my finger dauber and Versa Mark.
 
This technique is called A Resist and I applied it to White Daisy.

I rubbed the Versa Mark through the designs of the stencil where I wanted them with the sponge dauber, which for the tag I placed them all towards the bottom. 

I used Clear Embossing Powder to heat emboss this design. 

Starting with Tattered Rose Oxide Ink, I blended at the top of the White Daisy adding Picked Rasberry to the middle and finishing with the Seedless Preserves. 

You can use a kleenex or a soft rag to rub off the embossed design to make the white pop through. I spritzed the tag with water and used the heat gun. The key is to dry between layers. 

I saw this technigue by Jennifer McGuire and wanted to try it. 

Well, that's my technique using stencils. Hope you will try it.

Thanks for stopping by!  Please continue onto Michelle Loncar Blog where you will find some additional artwork highlighting this technique!  Be sure to leave a comment and let me know what you thought of my variation and happy hopping!


Thursday, February 10, 2022

Basic Scrapbooking 101

A Little History

When did Scrapbooking start?

As I mentioned before, my mom and even my grandmother made a scrapbook. But, did you know scrapbooking began several hundred years ago? What?

People used diaries, journals, and handmade albums to record thoughts, recipes, poetry and quotes. The earliest surviving book dates from the seventeenth century in Germany.

Leonardo da Vinci kept scrapbooks of drawings, ideas and text.

Common-place books appear as early as the 1590s. They were used for collections of diaries, drawings and clippings. Shakespeare's Hamlet mentions the recording of notes in a commonplace book.

By 1825, the term "scrapbook" was in use and a magazine devoted to the hobby, The Scrapbook, was in circulation.

In the late nineteenth century, scrapbooks were becoming popular, even in magazines. They included mementos, locks of hair, pressed newspaper clippings, (which is what my grandma put in hers), pressed flowers, calling cards, letters, and ribbons. Pictures were etched or engraved onto the pages.

During the Victorian era, even more embellishments were added, such as ornamental vignettes and cut-outs. Die-cuts (pre-cut paper shapes) and stamps were introduced in the 1870s and you could purchase these items from companies that manufactured these items exclusively for scrapbooks.

In the late nineteenth century, cameras were invented which became more affordable and so photos began appearing in the albums.

During the 1880s, an increased focus on genealogy gave scrapbooking another new direction.

Today, scrapbooks vary greatly from those of the 1500s. The manner in which they are presented and preserved has evolved, reflecting the knowledge of preservation and archival techniques.

However, one common thread connects the past to the present- scrapbooks have always told a story.