Saturday, January 15, 2011

Birthday Card

I made this birthday card for my 7 year old grandson. The bag was cut from the Cricut to fit the Kisses on the Go and then glued to the outside of the envelope. I used outdated Close To My Heart Paper and I am not sure if the stamp set is available or not.


The card idea came from the sketch and samples in the Jan/Feb 2011 Paper Crafts magazine. I cut the pennants out with the Cricut. Colored the balloons in with markers.

Color Challenge

Well, its been awhile. It seems when we get back from our 2 week vacation in October theres alot going on untill after all the holidays. One grandson always has a birthday a week after were home and since I usually make the cake it takes extra time. Then, this year we hosted my family Thanksgiving so, had to get ready for that, including making a small attempt to clean up Scrapbook and Sewing Room. Of course, I have more to do there but, at least we can walk around the tables. LOL!
  I had linings to sew and catch up with. Food to fix and really, I don't know where the last two months have gone. We had the 4 oldest grandsons the week between Christmas and New Years. Took them to Science Central and a Komet Hockey game. They were thrilled to say the least. We had our kids over New Years for our family Christmas. We have 2 more to go and were done.
   So, here I am and finally have some artwork to post. I am waiting on some new product from our brand new Idea Book to make Valentine things to post soon. I have joined a Blog Hop to share with you all kinds of ideas to make for Valentines. I hope you will come back and visit here and several other Consultant's artwork.
  I also decided to try this Challenge using 3 colors:


I chose to use B&T paper from a couple different Paper Packs. Sky from the Magnifique and the Pear from Olivia. I used a tiny ribbon embellishment from the Pear Mini Medley set. The rest is stamp pad colors Sky, Pear and Sorbet. The stamp set I used is D1470 Dreams Come True that is availabe right now in the sneak peek brochure Inspirations and you can get it at a discount when you buy the Wings Workshop on the Go this month. E-mail me for more information if you are interested.  I inked the word Dream with the Sky color first because its the lighter color and then rolled the bottom of the word in the Pear. Love the way it looks! Pretty simple card. The pattern comes from our book Wishes on page 115 and is card #8 in the Christmas Card Workshop.

Click on the Heart2Heart Challenge button above and view several other amazing ladies artwork.

Friday, October 15, 2010

Christmas Card Workshop

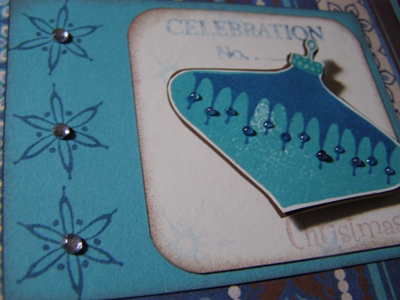
Its hard to believe its time to be thinking about Christmas Cards already! In November I will be doing Christmas Card Workshops and thought I would post the samples. Take a peek and let me know if your interested in a workshop. My first one is in a Hostesse's home and this can be an option for you also. Invite your friends and family and we'll make Christmas Cards.


We will use glitter, sparkles, brads and liquid glass to make your cards glittery and blingy! They are actually 2 different designs made 3 different ways along with 2 different colors and a variety of stamps to give you several choices. Envelopes are included.

Tuesday, September 21, 2010

September Stamp Of The Month

Here is some of my samples for the stamp of the month using some of the new colors.
I wanted to use the color scheme from the Hooligans Level 2 Paper Pack (X7129B) but, I didn't want to buy it. Instead, I used available cardstock of the new colors and B&T from the Olivia paper pack. Improvise, improvise.

Here is a close up of the stamp set above. Sorry, its stained with the Black ink and Stayz-On. A brand new stamp pad doesn't look this way, and yes, they do stain.

I took a lunch sack and folded it down to approximately 5 1/4 x 4 1/2 size. I random stamped the new Pear Cardstock with Pear ink cutting each piece to fit each rectangle with a bit of the paper sack showing all around.


You can decorate each section as you wish. I used the dotted paper from the Olivia (X7128B) Level 2  Paper Pack to get the Sunset and Pear color in the B&T. I used the new Gypsy cardstock and stamped with the Black ink for the head and hat and the sentiment using the new Lagoon color for a little extra color.

The inside is decorated with the two B&T from Olivia using fronts and backs. I used a clear acrylix card cut in half using only one half. I stamped the design on the acrylix with Stayz-On and stamped again with Black ink on the Gypsy cardstock cutting out the inside to fit underneath the acrylix stamped image.


Heres a better picture. I added some embellishments from the new Lagoon (Z1340) and the Sunset (Z1338) Mini Medleys. 

Heres a sample of one of the acrylix card (Z1309) that  I used. Be sure and peel off the protective covers inside and out to get that clear look.

Heres a couple more pictures of the inside. No space is left bare. LOL!


Its nice as a card and a treat bag!

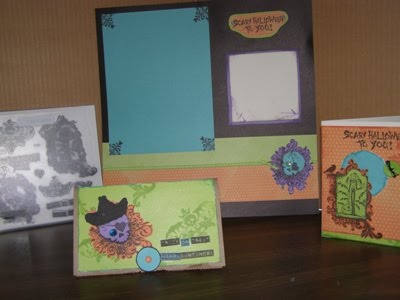
Here is a 12x12 layout page using black cardstock as the base. Very simple, fast and easy.

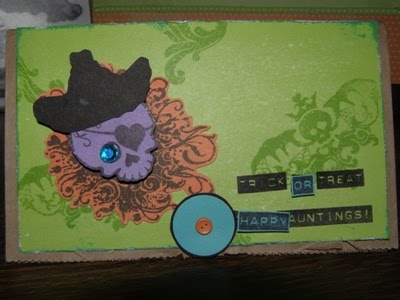
A close up of the little guy down in the corner. I used a Sparkle (Z1326) for his eye. "AAAAARRRRRGGGGGHHHHH!
Love me bling!"

Heres a card using all the colors listed for the Hooligans paper pack: Gypsy, Lagoon, Pear and Sunset as mentioned above.
Get this stamp set by the end of September and remember you can get it for a discount. Check it out in the back of your new Winter Idea Book. The first 3 people that leave a comment here will get one of the three items as a gift from me! The first two will be able to choose which one they want. If you would like a new Winter Idea Book let me know, they are Free!
Thankyou for looking.

Wednesday, June 16, 2010

And the winner is!

I want to congratulate Rhonda (from Huntington) and thankyou for responding to my post by e-mail. I will be sending your little gift in the mail.

Tuesday, June 8, 2010

New Grandbaby!

I am so sorry I haven't posted for awhile. A couple weeks ago we had a bit of excitement. Our oldest daughter had her first baby 4 weeks early. Needless to say none of us was quite ready for this. Mommy and baby are doing well even thought they sent him to Children's in Dayton for fear of infection (which he didn't have) and then he became jaundiced but, not bad enough to go back to Children's. I was out there for a week and 1/2 helping her so, everything was put on hold.

When I held my tiny 5 lb. 6 oz. grandson for the first time, I marveled at God's creativity! From his tiny little head, and tiny, tiny, tiny little fingers and toes. This is the greatest work of art ever made, better than any mere mortal could ever do or imitate. Then, we look around us at nature and marvel once again at the colors and shapes He created for us, His children, to enjoy. I love putting colors together to create something to share.

One of the days I was out there I went to my second daughter's house and helped her make the Baby Shower invitations posted below. We spent all day together working on these (42 altogether) and her two boys even helped put in the brads. They were so excited to help!


The paper is from a Scrapbook Store in Greenville, OH. along with Close To My Heart Cardstock, brads and inks. I am always amazed how we can match "contraband" paper with ours. ~giggle~  All of the wording was printed on the computer and matches the colors also. A CTMH consultant went through and figured out the numbers to make all 60 colors so you can match your journaling or Titles with our papers, cardstock and inks. If your interested in this list, e-mail me and I will send it to you.

                                                                                                                                                                                                                        
 This card is only 1 layer with a pocket and pullout tag with the information printed on it. The oval frame was cut out with CTMH cardstock and a layer of thin craft foam to pop it off the card.

We wanted to color the edges of the white tag to tone it down, so, we used a Sponge Dauber and lightly edged the tag with Topiary. I kept looking at it and was not feeling that tingling feeling so, I tried adding some Indian Corn Blue. AAAAhhhhhhhhh! Yes, it just made it so much better! By that time my Sponge Dauber was pretty rough on the top from doing 42 little tags so, it wasn't doing the same as the Topiary. What I did find out was the rough spots made it look like a sponge when I just tapped the color on in spots here and there. AAAAHHHHHHHHHHHH! Wonderful, it made the perfect finished look it needed! My motto for today: Always try another color or even two before you give up.                                                                                                


This was the amazing discovery my daughter made. She was leafing through her old CTMH Idea Books and found this very card and the strip printed on just like this. She realized that they cut strips of cardstock to fit through a label maker and printed the words on then you take sandpaper and rub lightly over the raised letters and voila, it looks like real labels. I can think of alot of possibilites with this idea on scrapbook pages too.
If you like this project, feel free to comment here by June 14 and get your name in the pot for a FREE drawing for a gift from me. I will draw the name on June 15 and will post the name of the winner here and on Face Book. Thanks for looking.


Wednesday, May 19, 2010

Creativity

I never realized untill I started creating cards then scrapbook pages how much I enjoy creating with paper, inks and stamps. Since I started this adventure of creativity, I had to recall my one and only year in High School I took Art. One project we made started with a drawing of a still life. I remember mine had a pitcher in it and probably other things that slip my mind but, I certainly remember the pitcher. We took those drawings and cut each object out of colored construction paper and glued them down on a base page of construction paper. At that point they looked like plain cut outs, very flat and undimensional, blah and boring. Then, we added something that started my heart pounding, and the hair to raise up on my neck!
This is a very typical reaction of excitement to this sort of thing, sorry.
 We took chalks and added shading and shadows and made the flat, boring things come alive and look 3 dimensional and real! I remember that project being my favorite thing I had ever done.
   Now, today, I can do this same thing with stamps, or just cutting something out with my Cricut and adding chalks, or markers or use water color brushes dippped in the ink on the lids of my stamp pads. And, yes, the hair still raises on the back of my neck and my heart pounds with excitement because it just hits me that way!

Wednesday, May 12, 2010

Our New Irresistibles

Our new Summer Idea Book and
our April-May Scrapbook Kit
A Miracle Awaits You feature           
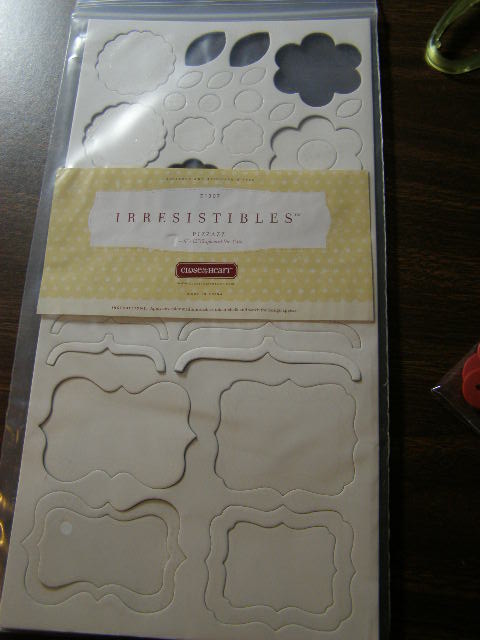
a new product called Irresistibles.
A great chipboard product with
an extra pizazz. You can color
them with stamp pads, markers,
watercolors and chalk. Below,
I show how to color the flower
and leaves with a stamp pad
(using a sponge)and markers.

For this card I used:

X7123B Cherry-O Level 2 Paper Pack
Z2108  Chocolate Stamp Pad
Z2153  Sweet Leaf Stamp Pad              
Z2166  Tulip Stamp Pad                  
Z2111  Crystal Blue Stamp Pad           
Z2167  Creme Brulee Stamp Pad           
Z2162  Honey Stamp Pad                  
Z2331  Key Lime Marker                  
Z2355  Topiary Marker                    
Z2266  Tulip Marker      
Z2364  Sorbet Marker
Z1307  Irresistibles

Z1320  Tulip Mini Medleys


Take a look at this Irresistible piece, can you see the little designs? They are going to pop out when we add the color.
First, I took the Sorbet Marker and colored the tiny seed looking designs.
 
I used Tulip Marker and colored in the rest of the flower and used the sponge to swab the extra color. Then, I took the sponge and dabbed it in a Chocolate Stamp pad and sponged the edges.
The center was colored first with Creme Brulee then edged with Honey and Chocolate.
Glue it to the center of the flower.

The leaves are Key Lime in the center and Topiary on the outside. Sponge the color to take off the extra.

Take the Chocolate Marker and put the dots all around the Sweet Leaf and Crystal Blue pieces.


Voila! The card is a pattern from our Card Program Book called Wishes. You will find it on page 89 called File Pocket. Try the Irresistibles for yourself on one of your own projects!