Wow! Today sure felt like Spring! Along with the strong winds, the ground should be thawing and drying out nicely. We will see.
So, for today, I did a card using the Mojo Monday sketch and the Heart2Heart Challenge using 3 of our Spring Colors- Sunkiss Yellow, Sky, and Sweet Leaf. Since I didn't have Sky Cardstock, I cut the flower from Heavenly Blue stamping the design on it with the Sweet Leaf.
Heres the Mojo Monday 231 Sketch.
I cut the scalloped circle, the inside circle, the tag, the inside of the tag, and the flower with the Art Philosophy Cricut Cartridge. I stamped on the flower with the stamp set in the Pemberley Workshop On The Go. I am really liking this stamp set for alot of projects. The blue circle is B&T from a retired Paper Pack that is the Crystal Blue color stamped with the March Stamp of the Month with Sky Stamp Pad ink. I stamped the background of the card with Bamboo Stamp Pad and the butterfly from the same stamp set from the Workshop on the Go.

The swirl (also from the March SOTM) is stamped with white acrylic paint that I patted on my stamp with a sponge and then embossed with clear embossing powder. This was a technique taught by Tim Holtz except I used our stamp pads (sunkiss yellow, sky and sweet leaf) spritzing the ink with water and patting the sweet leaf cardstock into the three colors. It was really amazing how this worked. I found out that when he says do something quickly he means it. My paint started drying before I got the embossing powder on it but, it worked fine. It really did make a difference to keep drying and adding more of the stamp pad ink colors. This is my first attempt and I can't wait to try it again. I also want to direct you to another link called Studio L3 for more ideas using Tim Hotz's technique.
The leaves, vine, butterfly, and sentiment were also from the stamp set that came in the Pemberley Workshop on the Go.
Click on the links above and check out the other great artwork and Tim Holtz's tutorial. Try them for yourself.
Another Mojo Monday! My card is made from the sketch above and the color combination is from the Heart2Heart Challenge. I used the back side of a B&T from an old Paper Pack for the blue background piece, Juniper Cardstock for the leaves and the scalloped piece and Desert Sand Cardstock for the flowers. The card itself, the scalloped piece, the flowers and the butterfly are all cut out of the CTMH Art Philosophy Cricut Cartridge.
Did I say how much I love this cartridge?
The butterfly was cut from thin chipboard (cracker box) and covered with a piece of B&T from the Roxie Paper Pack. I cut a darker piece (free hand) for the body and filled it in with CTMH Liquid Glass to make it stand out. I also drew in the antennas free hand with a black marker. I stamped a design on the flowers, made cuts partway to the middle of the flowers, and
layered 2 flowers each and added the pearls in the centers. Click on the links above and see more ideas for these 2 great inspirational pieces.
Heres the picture (above) that inspired the color combination for this card.
Thanks for looking.
This is my first attempt at one of Tim Holt's wonderful ideas. I don't have very many of his products so, I just dug into my Close To My Heart products and made this tag my own. First, a link to Tim's blog so you can read his tutorial and see his beautiful project.
Now, here is my interpretation of his mosaic tag for March. I hope to do Jan and Feb later.
First, I cut the tag from Close To My Heart's Desert Sand Cardstock using CTMH Art Philosophy Cricut Cartridge. Also, the 2 butterflies were cut from lightweight chipboard (used from a cracker box) using this same Cricut Cartridge. I love this cartridge, it has tons of designs on it!
I distressed the sides of the tag with CTMH Chocolate Stamp Pad and stamped a design on the tag with a Stampin' Up background stamp I had in my stash. Its pretty light and hard to see the design. I used a sentiment from the CTMH D1453 Friendship stamp set and the hole at the top is actually a stamp from the CTMH B1298 Be Happy Stamp Set which I think is no longer available. I stamped the hole from Desert Sand, cut it out by hand and tapped it in and on a Cocoa Stamp Pad to darken it which in turn made it kinda wet but, I wadded it up to make it look old and it even looks like leather! So Kewl!!!!
I happened to have a Tim Holt's brand of embossing powder on hand called Distress Embossing Powder-Walnut Stain. I didn't have the Wonder Tape but, I had the Terrifically Tacky Tape from Hobby Lobby and used another participant's idea and just layered the pieces of 1/2" and 1/4" together and trimmed them off around the edges of the butterflies. I wasn't sure if it would work with the embossing and I still don't know for sure if its right.
It doesn't look or heat as shiny as normal embossing, it looks like crusty dirt or grout but, it doesn't come off. I guess that means it worked?
The papers I used for the mosaic look are from the CTMH Level 2 Paper Pack called Florentine. I used both sides in my different pieces on the butterflies.
Finally, I used the March Stamp of the Month to add the swirl design at the bottom with the Chocolate Stamp Pad and a metal brad to give that little extra pizzazz. The ribbon is our new Color Ready Seam Binding ribbon that I sponged with Twilight Stamp Pad. Try this fun and decorative mosaic technique for yourself.
I made a card for 2 different challenges using some of our new papers from the new Spring/Summer Idea Book. The card design is from Mojo Monday Sketch Challenge shown below. If you want to see several other ideas from this sketch click on the link above.
The other challenge I used for this card used the 1-2-3 Challenge from the Heart 2 Heart Blog site. Be sure and click on this link too and find more great ideas for this fun idea. For this challenge we were to create something using only 1 stamp, 2 different patterned papers, and 3 embellishments. I don't know if the flowers and the brads are supposed to be counted separate or not, but, I thought the flowers needed something in the centers.

I used patterned paper from the Stella Paper Pack for the big design at the back. I used the Chocolate Stamp Pad to distress the edges to add depth. I also cut it from our Art Philosophy Cricut Cartridge. What an easy way to cut parts for our projects! The horizontal piece is from the Florentine Paper Pack. I cut around the scallop with my very essential CTMH scissors. Easy way to have a scallop! I distressed the edges with Chocolate. The scalloped circle is cut from Cocoa Cardstock and once again cut from the Art Philosophy Cricut Cartridge. The stamp is from one of the exclusive stamp sets that comes in the Art Philosophy Cricut Cartridge. Yes, it also can be cut from the cartridge!
The darling paper flowers are brand new in the Spring/Summer Idea Book on page 128. They are in a pack of several called Paradise Paper Flowers- Z1710. Everything is made from Close To My Heart products.
I would love to see what you do with this. Make your card or whatever you desire and post your picture in my Close To My Heart Artwork Album so we can all enjoy your creativity. You will be eligible to have your name put in the pot for a free gift! And of course, feel free to comment also. I love to hear from you.
Heres a 3x3 card I made for another challenge. The stamp set is D1491 Hooray Bouquet and all the actual flowers can be cut with our Art Philosophy Cricut Cartridge first then stamp the adorable designs on after. So fast and so easy. The torn B&T is a very old and outdated paper. The rest is from the Roxie Paper Pack. The flowers were cut from cardstock. I really would like to use up my stash so have been enjoying putting different things together and they work!
I also really like this stamp set plus the others I used on the previous projects. I just can't seem to get tired of them. Thanks for looking.
I made this card for Mojo Monday. My first attempt for this blogsite challenge.
Here's the design Mojo Sketch 225 we are using to make our cards from.
And here is my card.
Everything used is Close To My Heart products.
the 4 1/4 x 5 1/2 inch base is Tulip Cardstock. I used a dry embosser and my paper cutter to measure and emboss the lines. I flipped it over and sandpapered the raised lines. I used Cocoa ink and a sponge and sponged all edges of all the pieces including the flowers.
The smaller pieces are Tulip Red also. The lighter cardstock placed in the middle is Sorbet Cardstock. I used our lace ribbon at the top of the Sorbet.
The flowers are cut from our Art Philosophy Cricut Cartridge using 2 different B&T from the Roxie Level 2 paper pack. I cut them with the Cricut first then stamped them with the accompanying stamp called Hooray Bouquet-D1491. I layered them together, sponged the edges with the Cocoa and put an Olive Brad in the middle. The swirl is from the Love Life-D1482 Stamp set.
So there it is, if you click on the badge Mojo Monday to the right, you can see a whole lot more great artists and their interpretation of this sketch.
Well, I thought I was going to make this for a Challenge but, the deadline came and went. I decided to go ahead and post it anyway. Another technique using the White Acrylix paint that comes in the Distressing Kit- Z1299 and Close To My Heart's Reinkers. Using the re-inkers with the white paint not only guarantees the colors will match my Close To My Heart papers its also a way to save a few pennies by not having to buy all the different colors of paints. The reinkers can be used for alot of different techniques besides reinking your stamp pads. What a great versatile product!
Reinker Colors I used:
Sunflower
Tulip
Olive
Sorbet
I took a 12x12 piece of Sorbet Cardstock and using a dry embosser I used it to emboss every 3 1/2 in both ways making a total of 9 3 1/2 in squares. I cut off the extra 1 1/2 inch left over.
Flip the embossed cardstock over and using a medium sandpaper, sand all the raised, embossed lines. You can emboss more of the cardstock if you wish for a more distressed look. Take a soft cloth or Kleenex and wipe off the excess debris from sanding.
Here is a close up of the sanded cardstock.
I used a Styrofoam paper plate so the paint wouldn't soak in. Plop 3 (or more) piles of white paint. Add some reinker to each of these. You have to decide how much. Remember, the white makes it lighter.
I don't mix the reinker into the paint. I like to have the option of the darks and the lights to work with. I used a couple different types of brushes, but, here again, use what is comfortable and does the job. Its your creativity and what works for you the best.
Here I used a bristle brush. It will make more streaky strokes. Hmmmm.....that sounds cute......streaky strokes.
I brushed color lengthwise and horizontal. It will be different shades because you will pick up white with the dark and the paint will mix with each stroke.
I also used a sponge brush and got a whole different look. It will go on with a more solid look.
I left background color come through also and stayed inside the embossed lines so each square stayed a square.
I used the following Close To My Heart My Acrylix Stamp Sets:
D1491- Hooray Bouquet
C1408- Live Inspired
D1481- Vintage Type
D1482- Love Life
C1464- Blue Ribbon
These stamp sets are some of my favorites. I stamped several things and used some for the background. One thing bad about trying to stamp on top of the paint is, it doesn't show up as dark so, if you want it to be bold, I would suggest using the Staz-On.
Here is some close-ups of what I did with the stamps.
This wrinkled piece of cardstock was stamped on first, then, I decided to dampen it and saw the ink start to run. I thought, oh no, is this going to work? I went ahead and wrinkled it up then smoothed it out and let it dry. It is pretty cool how it softened the image and the cardstock dried just like this. Its stiff too, so I just put some pop up dots under it.
Ta Da......And here's the finished product.
I also made the accompanying LO.
I painted on the right side to match the other LO and then I stamped on that 1 1/2 inch left over piece that was already embossed and sanded. I also used scrap pieces here and there.
Now, its your turn. Try some paint and reinkers on your project. Post your link to your photos of your project in my Face Book page under this post so I can admire your projects too. Oh, and I love your comments too.
Stampingranny
Welcome to my blog. If you are coming here from Luisa, then your on the right path. This blog hop goes in a circle so, if you start here and make the rounds, you will end up here again.
This Blog Hop is featuring projects used from my scraps. I don't know about all of you, but, I am a collector and have all kinds of scraps of cut paper even from other projects. Below, is the 2 used and out dated Close To My Heart paper packs that I chose some of my B&T from. I decided to go with Blush, Baby Pink, Garnet, Desert Sand, Colonial White, White Daisy, Bamboo, Chocolate, and Garden Green as my color scheme.
I used the stamp set below to stamp on the designs I cut from our Art Philosphy Cricut Cartridge.


These are the stamp pads I used to stamp on the above cut pieces. Using the rolling method and stamping on them multiple times.
Using a sponge and Garden Green ink, I distressed all the edges to give them another color and some depth. I love adding color to things, makes them pop.
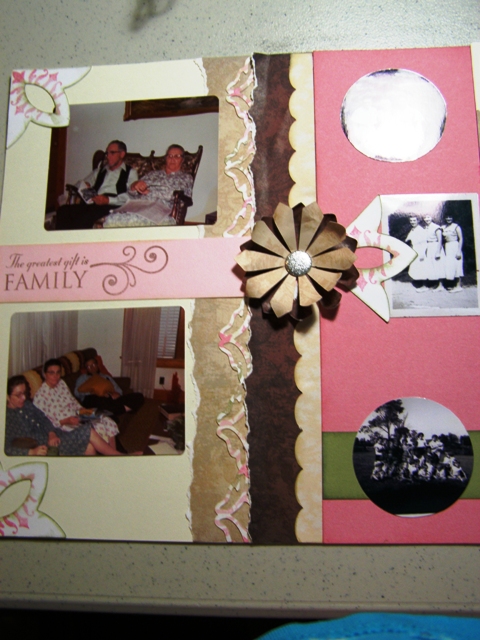
Heres the finished product. A 2 page layout using my scraps. I tore the edges of some pieces, scalloped the border of 2 other pieces using the Art Philosophy Cricut Cartridge, cut and put together 2 layers of flowers again using the Art Philosophy Cartridge.
Just a couple close ups of the pieces that were cut from the Cricut Cartridge and stamped on.
Well, thats all for now, you can move on to Elizabeth's blogsite from here. I hope you enjoy visiting and getting more new ideas for your projects.