Pages

Thursday, February 17, 2022

Basic Scrapbooking 101- Conservation and Storage

 Scrapbooking is all about preserving memories for generations still to come.  Fortunately, in today's modern world, we have the knowledge and distinctive advantage regarding how to do this properly to keep our photos and memorabilia safe from corrosion.

Remember the old magnetic albums in the 70's? Or that's my first memory anyways. I thought they were the bee's knees. LOL, but boy did they ever ruin my precious pictures. Especially the ones of my kids and everyday life back then. I have been literally digging my photos off of them and scrapbooking them in a better environment. I found out that Undu makes the job easier and doesn't damage them further.. 


The materials in these albums contained chemicals that, with time, break down to form acids. These acids, in turn, begin breaking down your photos. The term for this is acid migration.

Many papers contain lignin, a chemical compound derived from plant matter. In time, lignin will also beak down causing the paper to yellow and become brittle. This process of deterioration causes your photos to be damaged also. 

If you have photos that have been damaged or in danger of deterioration, you can replicate them by scanning or reprinting and making color photocopies on acid-free paper as a temporary solution. Damaged photographs can be restored in many different ways. Professional photo labs provide restoration services for photographs and negatives.

The internet is a good place to go to find new and up to date information for preserving and replicating your old photos. 

So, where do we start with this whole scrapbooking thing?

I would recommend starting with your photos. Are they jumbled in a box? Stored in unfriendly picture albums? 

You can start by sorting through the jumbles in a box and getting those photos out of those unfriendly albums and put them into photo boxes. 

Sorting and storing photos chronologically is a really good starting point. Simply record the year on the front of each box then place the photographs in order. If there are several photos of the same event, in lieu of writing on the back of each one, use a journaling card to record all the information relating to that event. Place that card in front of those photographs.

You can sort by themes, by person, by dates, by events, etc. As you sort, those ideas will come to mind, and it will get easier. You can add journaling cards as it will save time and energy when planning layouts plus, if it takes a while to get to them, it helps later for remembering the event. I thought I would never forget, but now that it's been 40 some years since the beginning of some of our photos, I can't always remember the important information. 

Here is a link to the 8 best storage boxes. Just make sure any box you choose is acid free cardboard. You can also purchase plastic boxes made for photo storage. Store the photos in a cool, dry location to avoid any damage from light and mold. 

Next week: Materials and Equipment


Basic Scrapbooking 101

What in the World do you scrapbook about? 

Many scrapbookers begin with a particular event in mind. Birth of a baby, weddings, graduations, birthdays, anniversary, vacations, starting school, retirement, pets or even the death of a loved one. 

The last few years scrapbooks have done some more evolving. Some people prefer smaller size albums or even books that are more journal type or maybe a more up to date version of a common-place book. They do a lot of more art type decorating along with a lot of journaling and a few photos.

Some have made scrapbooks about themselves and include information like personal collections, recipes, day to day life, food, goals, etc. Just think how this could be great information for the future generations to learn about their ancestors.

The great thing about Scrapbooking is that anyone can do it. The only prerequisites are being able to cut and paste. This craft appeals to all age groups. It can bring families together as they share the highlights and rekindle memories. Children enjoy looking through family scrapbooks, especially books of themselves.

It's a great way to make friends because there are opportunities for gathering together with other "scrappers" and working on your own projects. Sharing tools, ideas and inspiration is a plus at these events. Having the freedom to share your stories in relation to the photos you're working on is very therapeutic and draws people closer together.


Wednesday, February 16, 2022

Febuary Stamp of the Month Club- Here's The Story

 Just jumping on here to remind you of the February Stamp of the Month Club!

Aaaaaand, how you can get a FREE card kit when you order this fun and versatile stamp set for your collection. 

First, how can you get it? Three different ways actually.


Each month you can purchase a new D-size stamp set valued at $18.95 for just $5—or you can get it for FREE as a VIP Customer (click here)! Qualify for this special pricing by placing an order of $50 or more in Close To My Heart products. This month’s set is only available February 1–28.

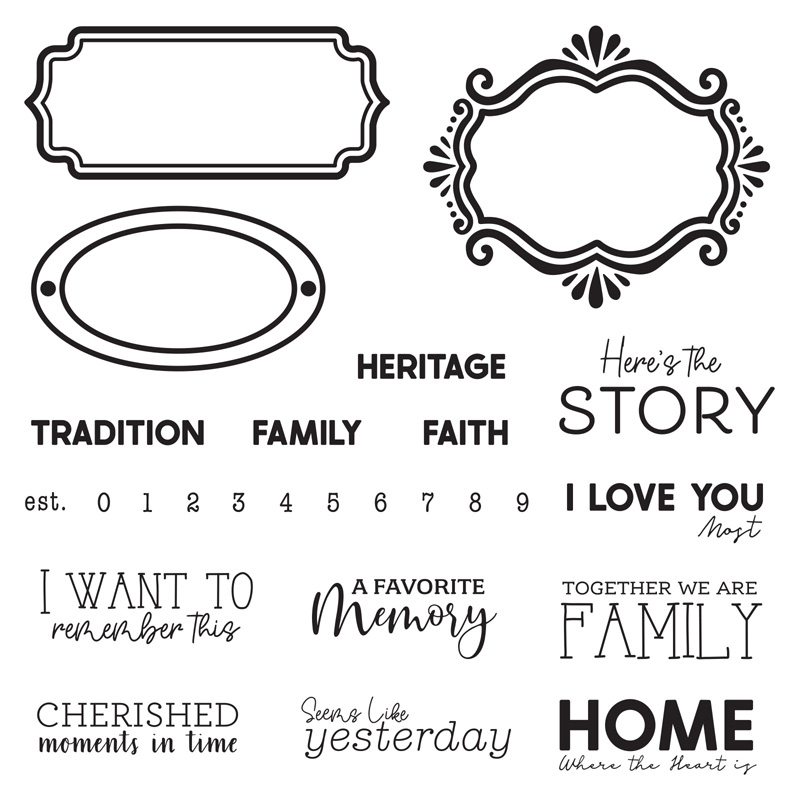
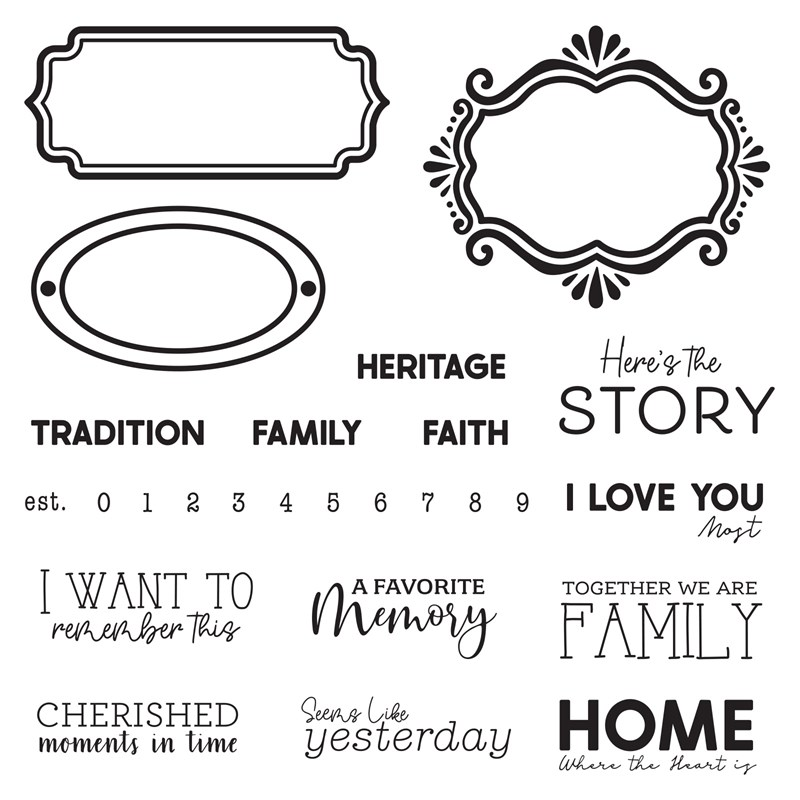
S2202, set of 26

Recommended Blocks: 1″ × 1″ (Y1000), 1″ × 1½″ (Y1016), 1″ × 3½″ (Y1002), 2″ × 3½″ (Y1009), 3″ × 3″ (Y1006)

S2202: Here’s the Story, set of 26


When you choose this stamp set, you will be qualified for the FREE Card Kit which I will send to you.
This pre-cut kit comes with three different designs, and includes the card bases, envelopes, embellishments and the stencils I used. 
Also, it includes the instructions how to do them. and lists of what else you need to finish these cards and how I did them. Your other option will be to finish them how you want to.

You will also be eligible to be a part of my private workshop group on Facebook where I will post the videos or lives that show how to put these cards together and how to do the backgrounds. 

Or, if you live close to me, you can join me at Deb's All Day Craft Day in N. Manchester, IN for a physical workshop with the option of using my inks. 

We meet once a month 10 am to 4 pm. You can contact me for the dates.


Tuesday, February 15, 2022

Technique Hop-Stunning Stencils


Welcome to our Technique Blog Hop!  

 Stunning Stencils is the name of the game and this month there are 15 of us highlighting the different ways to use them. This blog hop is a great big circle so you can start wherever you want and continue through to see all the fabulous artwork incorporating this technique. Enjoy!

 If you are coming from Danielle Edwards Blog, you are on the right track! 

I decided to incorporate the stencil technique with the S2202-February Stamp of the Month- Here's the Story. I was challenged by this stamp set because it seems like it's made for Scrapbooks and Journals, but I was able to come up with three different card designs.

Heres the Story


Using the X7277F Sawyer Digital Art Collection and a stencil sheet we used to carry, I cut my own stencil from the card overlay for my backgrounds.


I left the ink on the two stencils so you can see them better. 


 I blended the following Oxide Inks- 
Z3828Tattered Rose
Z3835Seedless Preserves
Z3837Pumice Stone 
Z3827Picked Rasberry and 
Weathered Wood 
on two of the backgrounds, I blended them together mixing colors and brushing them on the White Daisy cardstock. Spritz with water for a beautiful texture drying with your heat gun. Then, I used the stencil to add the darker Seedless Preserves color blending the color, mixing some other of the colors and adding designs where I wanted them using another stencil I had already cut from the X7276FSweet As Honey Digital Art Collection. I didn't cover the whole thing. 

Spritz with water again and dry with your heat gun. 
Flick White Gloss and let it dry.

The Tag Card I made with the Sawyer stencil and by using my finger dauber and Versa Mark.
 
This technique is called A Resist and I applied it to White Daisy.

I rubbed the Versa Mark through the designs of the stencil where I wanted them with the sponge dauber, which for the tag I placed them all towards the bottom. 

I used Clear Embossing Powder to heat emboss this design. 

Starting with Tattered Rose Oxide Ink, I blended at the top of the White Daisy adding Picked Rasberry to the middle and finishing with the Seedless Preserves. 

You can use a kleenex or a soft rag to rub off the embossed design to make the white pop through. I spritzed the tag with water and used the heat gun. The key is to dry between layers. 

I saw this technigue by Jennifer McGuire and wanted to try it. 

Well, that's my technique using stencils. Hope you will try it.

Thanks for stopping by!  Please continue onto Michelle Loncar Blog where you will find some additional artwork highlighting this technique!  Be sure to leave a comment and let me know what you thought of my variation and happy hopping!


Thursday, February 10, 2022

Basic Scrapbooking 101

A Little History

When did Scrapbooking start?

As I mentioned before, my mom and even my grandmother made a scrapbook. But, did you know scrapbooking began several hundred years ago? What?

People used diaries, journals, and handmade albums to record thoughts, recipes, poetry and quotes. The earliest surviving book dates from the seventeenth century in Germany.

Leonardo da Vinci kept scrapbooks of drawings, ideas and text.

Common-place books appear as early as the 1590s. They were used for collections of diaries, drawings and clippings. Shakespeare's Hamlet mentions the recording of notes in a commonplace book.

By 1825, the term "scrapbook" was in use and a magazine devoted to the hobby, The Scrapbook, was in circulation.

In the late nineteenth century, scrapbooks were becoming popular, even in magazines. They included mementos, locks of hair, pressed newspaper clippings, (which is what my grandma put in hers), pressed flowers, calling cards, letters, and ribbons. Pictures were etched or engraved onto the pages.

During the Victorian era, even more embellishments were added, such as ornamental vignettes and cut-outs. Die-cuts (pre-cut paper shapes) and stamps were introduced in the 1870s and you could purchase these items from companies that manufactured these items exclusively for scrapbooks.

In the late nineteenth century, cameras were invented which became more affordable and so photos began appearing in the albums.

During the 1880s, an increased focus on genealogy gave scrapbooking another new direction.

Today, scrapbooks vary greatly from those of the 1500s. The manner in which they are presented and preserved has evolved, reflecting the knowledge of preservation and archival techniques.

However, one common thread connects the past to the present- scrapbooks have always told a story.


Thursday, February 3, 2022

Basic Scrapbooking 101

Let's Start From the very beginning......

What is scrapbooking anyway?

I have an old scrapbook of my mother's that she put together as a teenager with photos from magazines and of famous people and other things that interested her in that day. As a young girl and even now, it gives me insight as to who she was as a young person. Things I treasure today, especially now that she's passed away.

So, for me, scrapbooking is therapeutic. Many people have written about or spoken about the positive impact scrapbooking has on mental health and I can bear testimony to this claim myself. This past time helped me through the transitions of life that were hard to bear at the time of the events. 

Scrapbooking is also an outlet for creativity, which I love doing. 

The biggest reason I scrapbook is for preserving the memories. I have thought so many times of a question that only my parents or grandparents could answer, and I no longer have that option of asking.  Or finding a photo and wondering who it is, or when this happened.

Not everyone wants to scrapbook their photos, but you can still organize, preserve and even journal photos in a quality album with sturdy (never outdated) page protectors with pockets. Just slide them in. 


Wednesday, February 2, 2022

Create Your Own Love Story!

 Wow: Love Story

Create Your Own Love Story!

Introducing new scrapbooking and cardmaking workshops featuring the beautiful designs of the Love Story paper collection!


These exclusive new scrapbooking and cardmaking workshops truly demonstrate the rich creative possibilities of the Love Story paper collection. Each cardmaking and scrapbooking workshop can be created using any of the three Love Story color options—Black, Mink or Toffee—and discounted workshop kits are available in each color.

The scrapbooking workshop kits include the Love Story paper packet + sticker sheet in the color of your choice, plus exclusive glitter die-cuts, coordinating cardstock sheets, photo placeholders, Memory Protectors™, and the coordinating Love Story Stamp + Thin Cuts set. These kits come at a 20% discount, but you can also purchase a kit without the Stamp + Thin Cuts at full retail price.

The cardmaking workshop kits also include the Love Story paper packet + sticker sheet in your choice of Black, Mink, or Toffee, plus an exclusive set of acrylic heart shapes, coordinating cardstock sheets, card bases, envelopes, and the coordinating Love Story—Cardmaking Stamp + Thin Cuts. Once again, you can get these kits at a 20% discount, or you can opt for the kit without the Stamp + Thin Cuts at full retail price.

When you purchase your chosen kit, be sure to download and print the instructions right away!


Tuesday, February 1, 2022

February Color of the Month- Mocha!

 I am so excited to share with you a new way to collect all 40 colors of our stamp pads!

Click here for more information.

Meanwhile, here is the card sample of what is in the kit. You will get 6 pre-cut kits that will include the embellishments also. 


There will be a FREE workshop on Facebook Live. 

 Here is a list of what you will need to finish your cards, or you can do them however you want to make them yours. 

  • Heat Embossing Gun
  • Clear Embossing Powder
  • Versa Mark
  • Black Exclusive Ink/ Memento Black Ink/or Intense Black Ink
  • Mermaid Lagoon Oxide Ink
  • Peacock Feathers Oxide Ink
  • Peeled Paint Oxide Ink
  • Mustard Seed Oxide Ink
  • Blending Tools
  • Spray Bottle for water (I just use an 8 oz. one I bought from Walmart)
  • Your choice of adhesive 
  • Journal Pen-Black
  • White Gloss Spray
You may have some of these things already in your stash. 😉

The FREE Facebook Live Workshop Date:  March 2 at 7 PM.

When you purchase your Color of the Month Kit (VIPS have special instructions). I will add you to the private Facebook Group exclusively for my workshops. You will be able to watch the replay for the whole month of March then it will be discontinued.