http://www.jeanettelynton.com/2011/10/shape-day-day-11.html
Check out Jeanette's blog for a really gorgeous 2 page layout using some of our chipboard and our new cricut cartridge!

Tuesday, October 11, 2011


Saturday, September 3, 2011
September Scrapbook Workshop

You can either order the Workshop On the Go kit for $29.95
or just the Roxie Level 2 Paper Pack for $9.95.
Note: There will be a shipping and tax charge added to these prices.
The Workshop On the Go Kit comes with:
- Roxie Level 2 Paper Pack
- My Acrylix Roxie Workshop Stamp Set
- 1 Bling Assortment
- 1 Black Hemp
- An Instructional Brochure
At the Workshop we will cut, stamp and put together the basic 2 page layout following the instructional brochure.
Please bring your basic scrapbook kit:
- a trimmer capable of cutting 12x12 paper
- craft scissors
- adhesives. (I have adhesives here to buy if you need them).
Required Tools | ||
| ITEM # | PRODUCT |
PRICE
|
|---|---|---|
| D1296 | My Acrylix® Chocolate Alphabet Small |
$17.95
|
| Z2105 | Black Exclusive Inks® Pad |
$5.25
|
| Z2118 | Desert Sand Exclusive Inks® Pad |
$5.25
|
| Z2166 | Tulip Exclusive Inks® Pad |
$5.25
|
| Z697 | Sponge |
$1.25
|
| Z341 | Memory Book Mini Glue Dots® |
$7.50
|
| Z1151 | 3-D Foam Tape |
$5.95
|
| Y1000 | 1" × 1" My Acrylix® Block |
$3.95
|
| Y1003 | 2" × 2" My Acrylix® Block |
$6.50
|
| Y1009 | 2" × 3 1/2" My Acrylix® Block |
$7.50
|
I will have the chocolate alphabet on hand to use. Also, I will have extra Colonial White cardstock and each person will need 2 sheets (.98) to finish your layouts at an additional cost. This also includes the ladies purchasing just the Roxie Level 2 paper pack.
Come and join us for a fun eve where you will finish 2-2page layouts to take home. Feel free to bring your photos and bring your friends, too.
Note: Our layout designs will fit Creative Memories pages!
Wednesday, June 15, 2011
Relay Race Blog Hop!
This spring, I participated in a relay race through e-mails and we are sharing with you the results today!
First, the race started with Nikka who created the original piece, she then passed it on to the next person. That person is the only one who saw the original artwork. What you will find is everyone's inspiration of the original as it was passed around through their own artwork. Ok, its hard to explain so start here and feast your eyes and you will see what I mean!
Nikka
First, I recived this photo of a card from Corinna to be inspired by.

I really liked the shapes of the layering pieces on the left and the paper flowers. So, I used a template (not a Close To My Heart product) to trace and cut similar shapes for my 12x12 layout. I used the Olivia Level 2 Paper Pack on page 38 of our Spring/Summer 2011 Idea Book. Using the exclusive stamp set from the Sophia Workshop Kit on page 41 of same Idea Book, I stamped leaves and the bird on the designed papers and cut them out. The background flowers are punched with our new 2" scalloped punch and I cut into the center of the flower all around then curled the edges up and down. I stamped the centers with the same stamp set and cut out of cardstock then layered on top of the punched flowers. The brads and buttons are from our embellishment collections. I hope you enjoy your walk thru our blogs and all the different ideas. Feel free to copy mine or even come up with your own creation! I would love to see what you come up with.

Feel free to comment then click on the link below to go on to Tamytha's blog:
Tamytha
First, the race started with Nikka who created the original piece, she then passed it on to the next person. That person is the only one who saw the original artwork. What you will find is everyone's inspiration of the original as it was passed around through their own artwork. Ok, its hard to explain so start here and feast your eyes and you will see what I mean!
Nikka
First, I recived this photo of a card from Corinna to be inspired by.

I really liked the shapes of the layering pieces on the left and the paper flowers. So, I used a template (not a Close To My Heart product) to trace and cut similar shapes for my 12x12 layout. I used the Olivia Level 2 Paper Pack on page 38 of our Spring/Summer 2011 Idea Book. Using the exclusive stamp set from the Sophia Workshop Kit on page 41 of same Idea Book, I stamped leaves and the bird on the designed papers and cut them out. The background flowers are punched with our new 2" scalloped punch and I cut into the center of the flower all around then curled the edges up and down. I stamped the centers with the same stamp set and cut out of cardstock then layered on top of the punched flowers. The brads and buttons are from our embellishment collections. I hope you enjoy your walk thru our blogs and all the different ideas. Feel free to copy mine or even come up with your own creation! I would love to see what you come up with.

Feel free to comment then click on the link below to go on to Tamytha's blog:
Tamytha
Monday, May 2, 2011
Women's Birthday Cards Workshop
Wow! Its been awhile. I have been to at least 4 Scrapbook Retreats and just normal life has been taking priority over my blog. Sorry.
Heres a sneak peek of my next Workshop in June.

Here are some close ups of each card.


These simple and easy cards are made with the Sophia and Miracle Workshops on the Go along with their own unique stamp sets not in the book. I hope they inspire you to make your own Birthday cards. If you want to come to my class it will be June 28 at my house. Call or e-mail me for more information.
Heres a sneak peek of my next Workshop in June.

Here are some close ups of each card.


These simple and easy cards are made with the Sophia and Miracle Workshops on the Go along with their own unique stamp sets not in the book. I hope they inspire you to make your own Birthday cards. If you want to come to my class it will be June 28 at my house. Call or e-mail me for more information.
Sunday, February 6, 2011
Collage Card
I learned this technique just a few weeks ago and decided to try it with the February Stamp of the Month. Its called Puddle Pad and its amazing what your design looks like from the mess your pad looks like! Then, the circle is just white acrylics paint mixed with our reinkers. Just painted flat strokes making squares of color some going vertical and some horizontal. You can add some of the colors to the others to give it some interesting contrast. Then I stamped the grid on with vineyard berry and the Noted Background stamp. The paint keeps the ink from being as dark but, I think it looks great with this. I stamped another background design from the above mentioned stamp set with the Desert Sand on Colonial White then tore a piece out, distressed the edges with the Desert Sand. The tiny heart was tapped into the puddle pad "mess" then stamped with the Black and a background stamp. Added 3 tiny pink sparkles. Double click on the card for a closer look. Now, hop on down and visit the others!
 Wings Level 2 B&T Paper
Vineyard Berry Reinker
Juniper Reinker
Sweet Leaf Reinker
D1412 Noted Backgrounds Stamp Set
D1453 Friendship Stamp Set (February Stamp of the Month)
D 1254 Soul Mates Stamp Set
D1464 Card Chatter- Love Stamp Set
buttons are from our new assortments

Vineyard Berry Reinker
Juniper Reinker
Sweet Leaf Reinker
D1412 Noted Backgrounds Stamp Set
D1453 Friendship Stamp Set (February Stamp of the Month)
D 1254 Soul Mates Stamp Set
D1464 Card Chatter- Love Stamp Set
buttons are from our new assortments
Saturday, February 5, 2011
Matchbook Card
Here is another Matchbook Card just turned different. Same Wings Paper Pack. This one I sprayed a mixture of Pearl Paint, water and Vineyard Berry mixed in our new spray pen. Love this new tool! So many different things can be done with this pen. The green heart was stamped in the sweet leaf, rolled in juniper, cut out and glued to black cardstock then cut out again with a tiny bit of the black showing. Love the way it makes the heart pop off the page. Very simple card.
 I added a pink sprarkle on the pink button. Love that bling! Hop on down and check out the others!

Friday, February 4, 2011
Valentine #4
Here is day #4 of our Valentine Countdown Blog Hop! I hope you have been enjoying all the super creative ideas like I am. Today, I am doing a little 4 1/2 x4 1/2 card called Matchbook (pg. 76) in our Wishes Card Confidence Program Book. When you purchase this Book you will get a CD loaded with templates for the cards (like the one here) and envelopes to fit! I am including a little tutorial to show how I made this card using the Masking technique that Jeanette taught us last week in her blog. This is so much fun.

 First you want to decide which design goes to the back and which one is on top. I then stamp the top design on a piece of thin paper like copy paper or if its small enough, post it notes will work fine and you can use the sticky already on it.
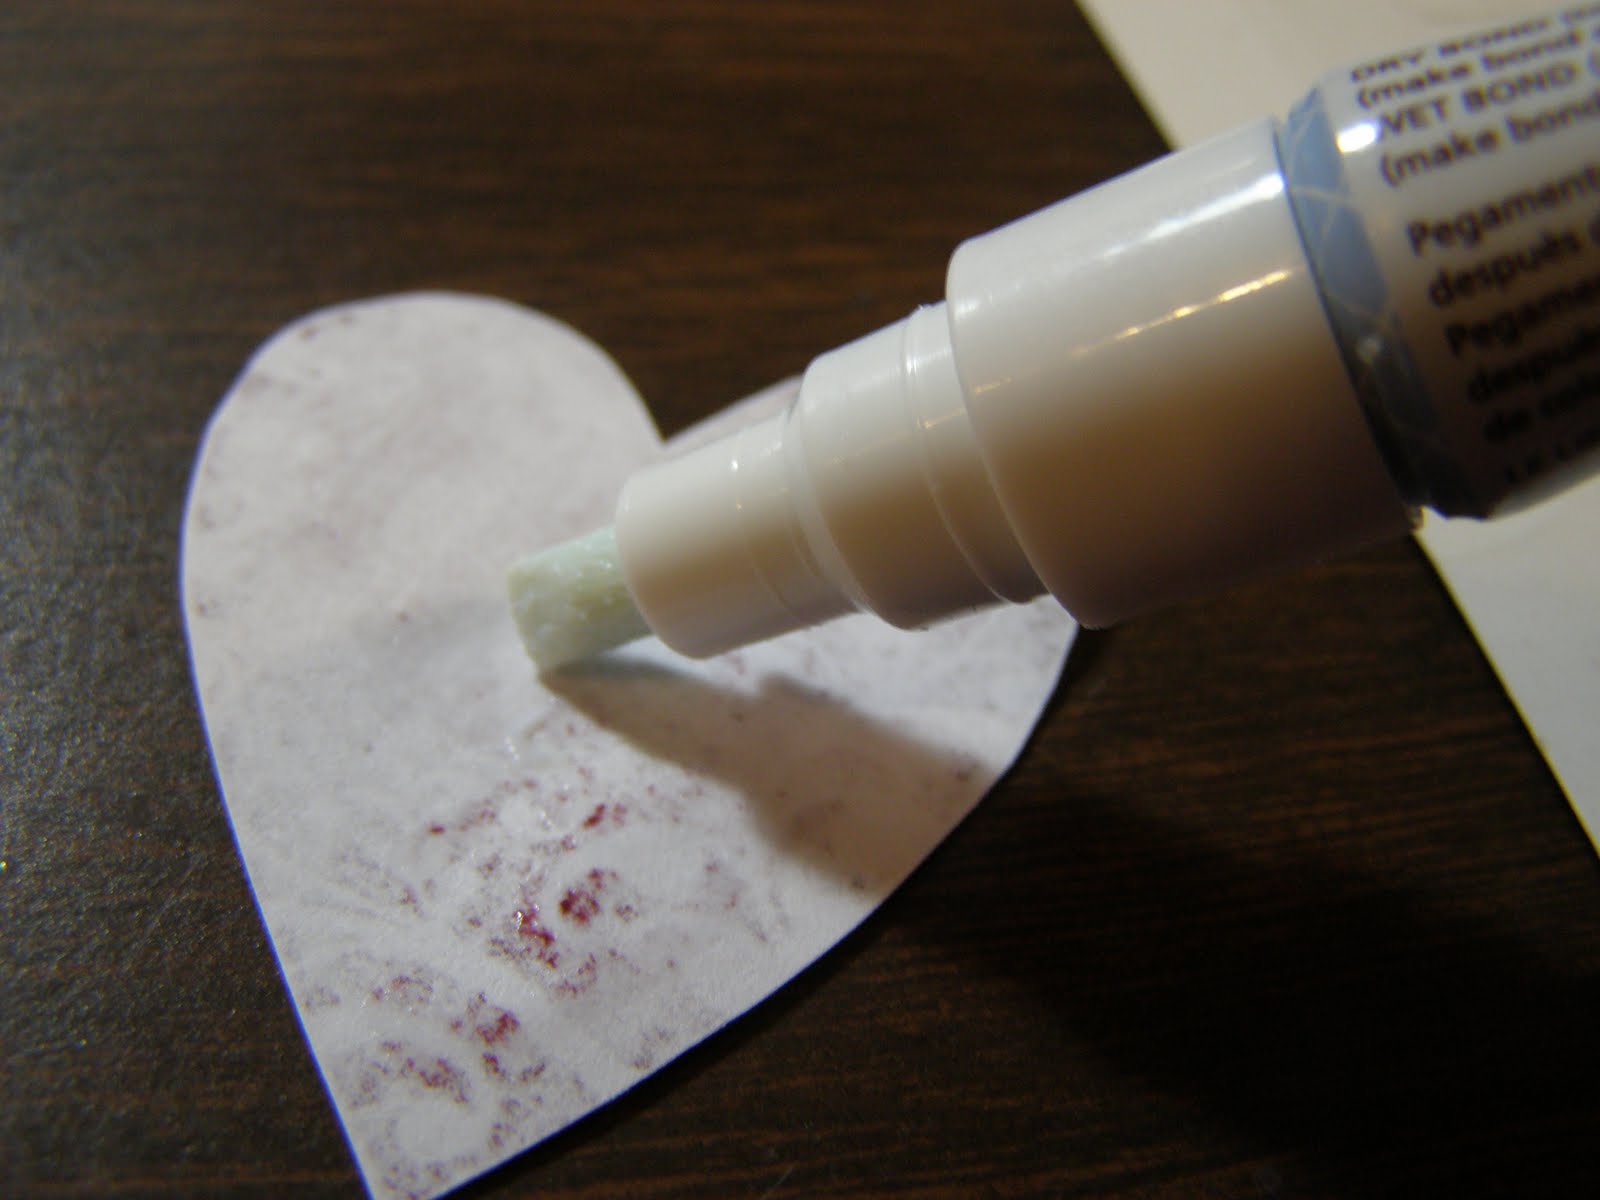
 Cut the design out and apply glue like our Bonding Memories Glue Pen. Set aside and let it dry completely. It will be a temporary bonding like sticky notes.

 Next, you will want to stamp that same design again on your project. I stamped in the lighter color (Sweet Leaf), rolled the edges in Vineyard Berry and Juniper then stamped it. Lay your cut out stamped image over this, it should fit perfectly. I wanted the design to fade into the background so, I stamped my background stamp over the top of the mask using the Juniper color.
 Wow, that looks weird! Well, lets see what happens when we peel off the mask!

Voila! Now, that looks much better!
 Now, lets look at how this card is constructed. You will need to print the template off and cut it out. I just used it for reference for cutting the cardstock with my paper trimmer.
 I also used my paper trimmer and a dry embossing stylus to score the folding lines.

 I used Tombow to glue a package of M&M's inside for a surprise!
 I scalloped the edge of the little overlap on the bottom with our Corner Rounder and fastened it with a retired photo clip.
List of Products:
Level 2 Wings Paper Pack
Sweet Leaf Cardstock
Colonial White Cardstock
Soul Mates Stamp Set
Card Chatter-Love Stamp Set
Juniper Stamp Pad
Vineyard Berry Stamp Pad
Sweet Leaf Stamp Pad
Black Stamp Pad
Jump on down and check out the rest of the bloggers!




Voila! Now, that looks much better!


List of Products:
Level 2 Wings Paper Pack
Sweet Leaf Cardstock
Colonial White Cardstock
Soul Mates Stamp Set
Card Chatter-Love Stamp Set
Juniper Stamp Pad
Vineyard Berry Stamp Pad
Sweet Leaf Stamp Pad
Black Stamp Pad
Jump on down and check out the rest of the bloggers!
Thursday, February 3, 2011
Week of Wonder by Jeanette Lynton of Close To My Heart
While you are in here looking at the Valentine Countdown, check out Jeanette's Blog by clicking on the blue button to the right. She is teaching an interesting technique using the embossing tools and product. Love the color combination in these projects.
Subscribe to:
Posts (Atom)