So, with that said, I am a bit behind so, what I want to share on here first is the projects I did with the February Workshop Your Way of the month~Charlotte.
I used watercolors on the flower and leaves and some on the background. I used various stamp sets for the background along with some water colors. A couple of the Charlotte Complements and the dots are Liquid Applique. I
have been asked for a tutorial on how I did the back ground.
I attempted to copy this tutorial (thanks to Pete Hughs of Sizzix) using Close To My Heart Stamp Pads- Sorbet, Slate and Whisper. I didn't get quite the same effect, maybe because our stamp pads are different from Tim Holtz. And I didn't use the Water Color paper just regular white card stock.
I then just stamped with various CTMH stamp sets-
D1544- Distressed Background-(retired)
Before I start, I want to say that using Water Color Paper works better than regular card stock. It holds up to the water you will be putting on it. So, needing to do another example to show you how I did the background I tried the above directions again on the sample on the left......
and watercolors on the right using Water Color Paper. On the left one I used the sponge shown and with a circular motion added the colors Sorbet and Slate. Sprayed it with a lot of water and still didn't get the results so I just left it like you see adding the different background stamps with Cashmere, Cocoa and Slate. I also used the sponge and put more color on where I thought it needed it and because there was water on it I was able to smooth out the edges of the ink.
Using the Cashmere and the sponge shown I distressed the edges all the way around. Below is the other attempt with the watercolors. Lots of water is the key and I held it upright to let the colors drip down. I tried to match the sorbet and the slate. You can either let it air dry or dry it quicker with a heat gun.
You can also go back and add more color if you want it darker and even let the lighter color show in places, gives it a different look. The thing about water colors is, you can't make mistakes the sloppier the better. Once its dry, add the background stamping in the Cashmere, Slate and Cocoa. Distress the edges with the Cashmere like it shows above.
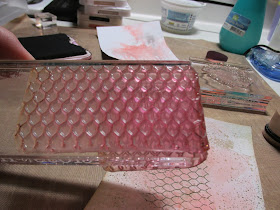
The stamp was too long for what I wanted to do with it so I wrapped it around the end of the block and stamped with Cocoa.
I added the Doodled circle with the Cashmere. This is the left sample with the stamp pad inks. And below is the water colored sample.
I used this stamp set for the flowers and leaves. It has die cuts (below) to make cutting them super easy!
It is recommended to use Black Memento Stamp Pad or anything equivalent that is water resistant or permanent ink. Let it dry well. I start with a wash of watercolor and water. Its better to have less than more at the start because you can always add more and build up. If you add too much the paint tends to feel chalky so keep it thin if you can.
I hope this helps. You can send me questions by messaging me on FB. Have fun with this and play with the paints. Another idea if you don't have the paints is to use the ink in the lid of your stamp pad. Just squish the lid into the pad before you open it and use the residue left in there in the same way you would the watercolor paints~lots of water.
And now, here are the rest of the cards and the 3 scrapbook pages I made with the Charlotte Workshop Your Way.
With the Workshop Your Way you can make 3 two page layouts......
The colors worked wonderful with our Son's wedding pictures.
And these 3 cards below. There is enough paper to make 3 each of each design.
And there is a few scraps left to make a few more cards. I hope these are inspiring for you. Happy crafting!


No comments:
Post a Comment