Tuesday, October 15, 2019

"Back to the Basics!"


Hello! This is a basic technique I wanted to share with you today. One of many ways of making your own background paper.


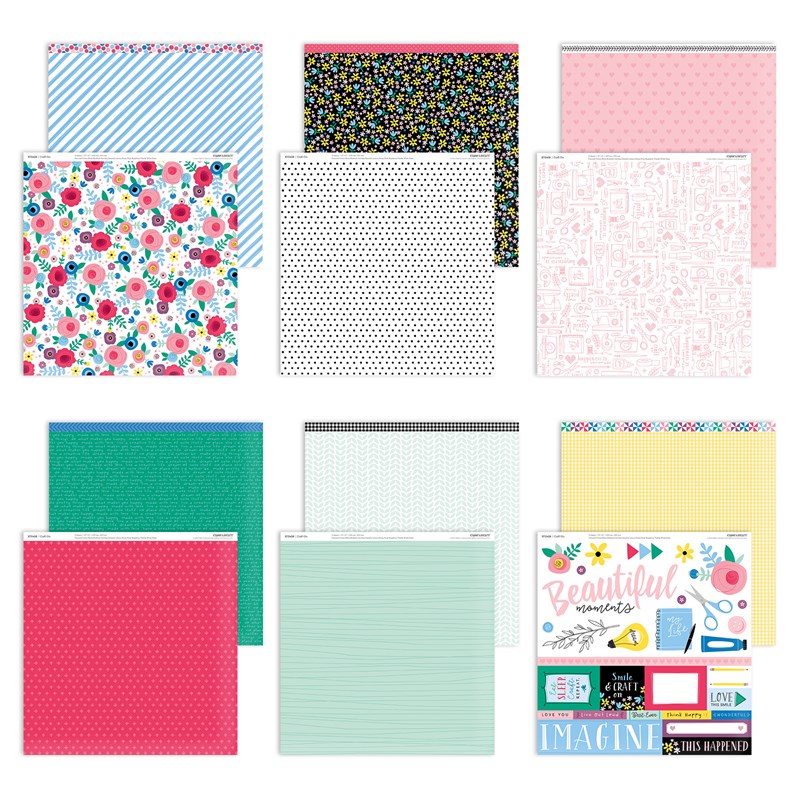
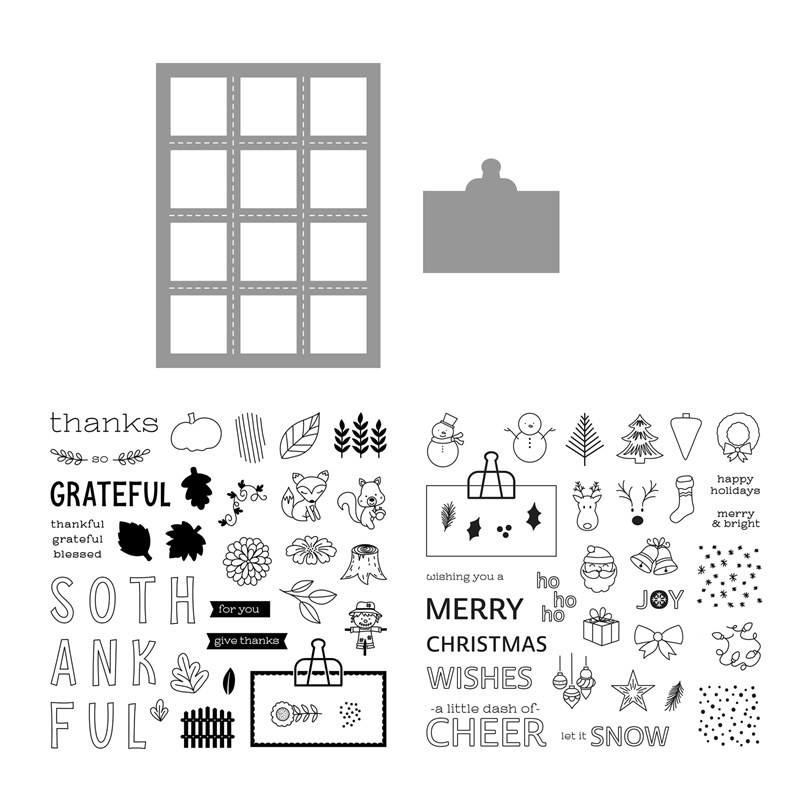
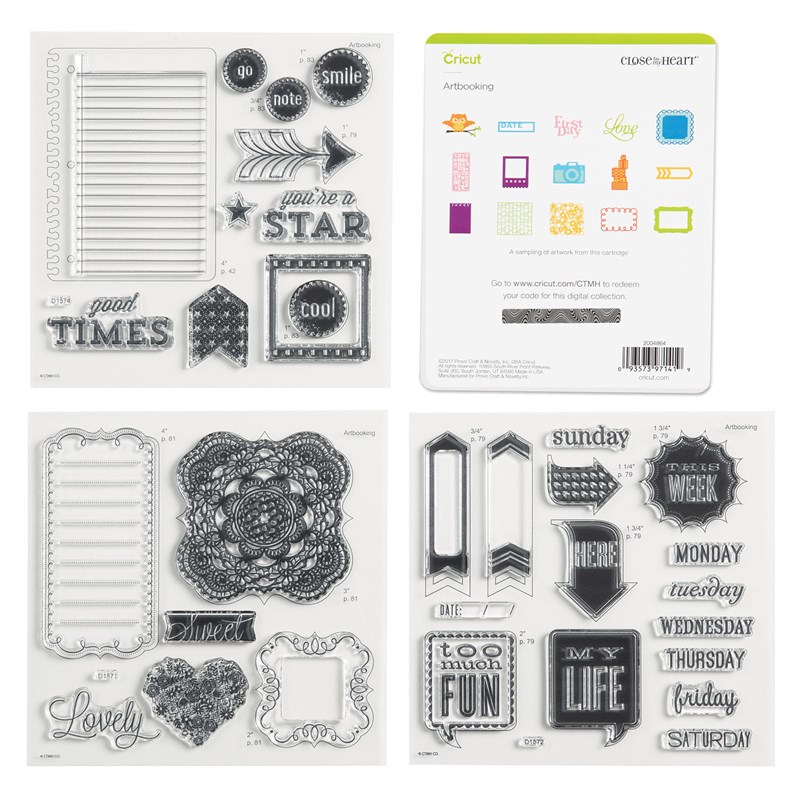
I made two cards. This one is made using the October Stamp of the Month and the Hawthorn-Card making Stamp set for the sentiment.

I have been searching for the best tool to use to do this fun and versatile technique so, I will show you the tools I use.

They all work great, but, the ones that make the smoothest blend are the make up brushes. Plus, they seem to be able to do the job with less of a workout too. I purchased these from Amazon. 
The one with the rounded sponge on the end (which can be replaced) is new and came from Scrapbook.com. 
The flatter one is the new mini made by Ranger. I was able to get bulk replacements of the sponges from Amazon. 


*I want to emphasize here the importance of keeping the circular motion to achieve the smoothness.

I used Water color paper but, you can also use our White Daisy card stock. Both are super smooth and work well with the blending of the inks. The White Daisy card stock however cannot handle a large amount of water or paint.
I used our Close To My Heart water-based dye ink pads(Paprika, Saffron, Toffee), and with a circular motion scrubbed the ink pad with it. Using our All Purpose Mat, keep the circular motion, starting on the pad (helps with the smooth blending) and moving onto the card stock, keep moving and until you need to pick up more color. You can even blend two different colors together where they meet. It takes a bit, but with patience and consistently doing the circular motion with pressure (less with the make up brushes), it's amazing how smooth it will look. 

You can leave it the way it is or as you can see in the picture above, I lightly squirted water on it. It leaves spots that make the background very interesting. I also used a heat gun to dry the piece between layers of color. 

For the leaves, I always stamp with the water repellent inks like Memento. If you squish the lids and open the ink pads, there will be ink in the lid and you can use the water brush, or paint brushes and water to water color the leaves. It doesn't take much. Just add the color. Don't need to take a lot of effort. I even used the background color popping through for some of highlights and shadows. Add other colors for contrast. When I dried this layer with the heat gun, the leaves really popped off the page! What a surprise. They first looked muted. Love it!

The second card is stamped (black Memento) using the Every Little Thing-Scrap booking stamp set. I blended the Wisteria into the corners and the Canary into the middle. Lightly sprayed water over all of it and dried with the heat gun. Stamped the flower in the corners over the Wisteria. I water colored more ink on top of the flowers and it darkened them. Don't color all the flowers, just the focus point ones. I used the Julep for the leaves. Then. I added shimmer with the clear Shimmer Brush to the flowers and leaves.
I used the alcohol markers to color the bird and heart and fussy cut them. The sentiment is cut from the oval thin cuts. 


I hope you will try this technique. Be sure and share your projects on my facebook group Making Pretty Things With Paper! Would love to see what you do with this.

Tuesday, October 1, 2019

October SOTM Blog Hop - Autumn Air

Image may contain: textImage may contain: text

Welcome to the October Stamp of the Month Blog Hop- Autumn Air. This is a great stamp set for Scrapbook Layouts. You can make cards also and with both you can add other stamp sets or Cricut and Thin Cut pieces.

There are about 29 participants on this blog for you to get inspired by. It's simple to hop along just click on the link at the end of the post on each blog to move to the next one!

If you have come here from Alyson's Blog, you are on the right path. The blog hop is a great big circle, so you can start here and work your way all around. If you get lost along the way, you'll find the complete list of participating Consultants on Melinda's Blog.


I decided to do a 2 page layout using the Hawthorne paper pack and color scheme. I love the rich colors in this set. The pumpkins are cut from the new Close To My Heart Cricut Collection called Complete Creativity. In order to purchase this Collection you will need to go into Cricut through your consultant's affiliate link which is at the bottom of her website. The lace background is also a Close To My Heart Cricut Collection that was previously retired but is now made available again in Design Space when you purchase Cricut Access. It is by far my favorite~ Art Phylosophy.

Some of the leaves are on the featured stamp set and the other leaves are from the Hawthorne-Scrapbooking Stamp set and Thin Cuts. For the bigger leaves I used the Stamp and roll method using two colors and starting with the lighter color and rolling the edges with the darker. The smaller leaves are from the stamp of the month stamp set and I stamped with intense black and colored them with a sponge and ink from the stamp pads.

I used Sangria, Evergreen, Goldrush, Toffee, Fern, Nectarine, Almond, Saffron, and Black. Hope you are enjoying all the creativity of the Consultants and getting great ideas. Now, hop on over to Katy's Blog to see her creation!

Leave your comments and let us know what you think!


Sunday, September 15, 2019

Technique Hop - "It's in the Script!"


No photo description available.

Hey!!!! I sure hope your enjoying all these Blog Hops as much as I am!!!! And, here is another one! So, welcome to our Blog Hop!

This one is featuring Script using either stamp sets or even writing the script ourselves. There are 9 Close To My Consultants sharing their beautiful creations using new product. It's simple to hop along, just click on the link at the end of the post on each blog to move to the next one! 

 If you have come here from Wendy Kessler's Blog, you are on the right path. The blog hop is a great big circle, so you can start here and work your way all around. If you get lost along the way, you'll find the complete list of participating consultants on Melissa Robinson's Blog

Let's get started.

 I made this very simple card with a tiny snowman from the September National Stamping month Kit called Share The Seasons. This special comes with two Thin Cuts and two stamp sets featuring both the Fall/Thanksgiving season and Christmas Season. 


I used the tiny snowman and the snowflake background stamp. I used the Let it Snow sentiment. I used the alcohol markers to color everything and doodled with my white gel pen. Here is a close up of the card. I added some of the new Julep glitter gems. Julep is our new Color of the Year!!!!


Now "Hop" on over to Melissa's Blog to see her work! Be sure to visit all the Consultants at their Blogs to get some great crafting ideas and other fun ideas! 
Leave your comments and let us know what you think!


Here is another card I made with this kit also.


The Poinsetta is cut from the Close To My Heart Flower Market Cricut Cartridge.

You can find this cartridge and all of the other Close To My Heart Cricut Cartridges here.


Thursday, September 5, 2019

New Product Blog Hop

Image may contain: 1 person, text

Yikes! About 4 P.M. this afternoon I suddenly had an "uh oh" moment! I remembered I had another Blog Hop to get ready for and I had nothing prepared!!!!!! 

Today, we have 22 Close To My Heart Consultants sharing their beautiful artwork featuring new product from our brand new catalogs!!! We have two that you can get FREE with your first purchase on your favorite Consultant's website. Don't have a Consultant? You can click here and check out mine if you like. 

If you have come from Jessica Kaiser's your on the right track.
It's easy to follow a long, just click on the next consultant's name at the bottom of the page. If you get lost the list is here on Melinda Everett's Blog page.

So, I grabbed my Hawthorne paper pack and sticker sheet and made a card!


One thing I really like about our stickers is they work so well with our Liquid Glass when you need some areas to look like glass or plastic or just want to add a shine! I added the Liquid Glass to the little squares on the reel at the back of the card. Love how it makes it come to life!

There is a lot to love about this paper pack and the stamp sets that go with it. So vintage!!!!! You can use it for family, Thanksgiving, Fall, Guys and even camping cards, scrapbook pages and other gift type items.

The leaf in the background was stamped with Saffron and rolled in the new Sangria. The No. 1 fun was stamped with Charcoal. This stamp set has it's own Thin Cuts which makes cutting the that leaf and that tiny sign so very easy!!!!! Everything else is from the sticker sheet. You now have a choice whether to purchase the paper pack by itself or with the 12 x 12 sticker sheet. 

Hawthorn Paper Packet + Sticker Sheet
Hawthorn Coordinating Cardstock

Hawthorn—Scrapbooking Stamp + Thin Cuts
Now, move along to the next blog by clicking here on Krista Hershberger's name to see her beautiful creations. 

Sunday, September 1, 2019

September SOTM Blog Hop- Random Act of Cardness

Image may contain: textImage may contain: text


 I hope your all having a wonderful Labor Day weekend! Were spending the weekend at home except church this morning. Brought a couple grand kids home with us after eating lunch at Culvers and grabbing a few groceries. My grandaughter is sorting through retired cardstock for me and organising them by color. I had already went through a ton of retired paper packs and sorted them out into my retired bins. It's always so nice to downsize. 

Can you believe it's September 1st already? For us Close To My Heart Consultants this means a brand new catalog! Actually, two catalogs and a long with that means brand new products and of course a Stamp of the Month stamp set! So much excitement it's hard to breathe!!!!!! LOL!

Anyway, welcome to our Stamp of the Month Blog Hop! This month's stamp set features great words that you can use on cards and scrapbook pages! The name of this stamp set is called Random Act of Cardness and will work great for those kind and sweet cards to send to someone who just needs a bright spot in their day. We can all use a pick me up now and then. This set also has 17 stamps in it and you can only get it in the month of September. 

If you have come here from Jessica Kaiser's Blog, you are on the right path! the blog hop is a great big circle, so you can start here and work your way all around. If you get lost along the way, you'll find the complete list of participating consultants on Melinda's Blog

This month we have 21 Close To My Heart Consultants sharing their creations using this month's SOTM and other great CTMH products on their blogs. This is simple to do- just click on the link at the end of the post on each blog to move to the next one! Here we go!


Let's start with a card. I got this card design from the Make It From Your Heart Vol. 2- Pattern 7 page 18-19.

The sentiment was stamped on a circle cut from the largest stitched circles Thin Cuts. I fussy cut the Sapphire background after adhering this piece to it. The center piece I stamped with D1887- Strokes of an Artist and the D1877- Every Little Thing Scrapbooking stamp sets. I also used the Strokes of an Artist on the background of the sentiment circle. 

I used Julip, Mint, Black, Sapphire and Charcoal stamp pad inks. And the final hurrah~ our new Julep glitter gems! Julep is the new color of the year and I am totally loving it!!!! The paper pack is the new X7248S-Every Little Thing Paper Packet plus Sticker Sheet. You have the choice to just purchase the paper pack alone also.


Here is a close up of the card.


I also made a two page layout and used the sticker sheet, the Complements and the Vellum Die- Cuts that is available with this paper pack. I colored the vellum butterflies and leaves with the Shin Hahn Markers and added gold glitter brush on these and the black complements. I just love this paper and how those stripes work so well on the flower background. I can't quit looking at it. 


Now "Hop" on over to Jen Rubio's Blog to see her creations! Be sure to visit all the Consultants at their Blogs to get some great crafting ideas and other fun ideas! Remember, the September SOTM is only available until September 30! Contact your CTMH Consultant (or click here ) to see how you can get this stamp at a discount!


Thursday, August 15, 2019

Technique Hop - "Sparkle & Shine!"

Image may contain: 1 person, text


Sparkle and shine-Technique Hop! What does this mean? 

Artwork made with a variety of embellishments including sequins, Shimmer Brush pens, glitter paper and more! 

This month there will be 16 Close To My Heart Consultants showing you their different ideas using these items on their projects to bling it up!!!!!!!

If you have come here from Catherine Nowak you are on the right track.
The blog hop is a great big circle, so you can start here and work your way all around. If you get lost along the way you'll find the complete list of participating consultants on Melissa Robinson's blog.

You can follow along by clicking on the link at the end of the post on each post. This will enable you to move smoothly along to the next blog post.

I decided to make a birthday card for the camping loving guy or girl! 


Into the Wild-Z4068
Silver Glitter Paper
Silver Glitter Paper- Z3239


I used the Silver Glitter Paper and cut the frame with the Stitched Rectangle Frames Thin Cuts shown in the first picture. I love how this silver glitter paper looks with the Charcoal background. Charcoal is such a neutral color I decided to brighten up the card with some brighter colors.

So, I removed the center of the frame and re-cut the frame with the White Daisy Cardstock. I used the Carolina stamp pad and blended the ink on this piece. Using the Bluebird stamp pad and the stencil I cut from the Close To My Heart Artbooking Cricut cut and the Stencil Sheet, I blended just a few holes for some texture. I used the  ShinHahn markers to color the camper and doodled with a white gel pen. The background paper is from the paper pack called Into The Wild. 

Stamp set is called:Happy Trails+Thin Cuts (and the Thin Cuts are still available till Aug. 31)
Other colors used: Sapphire and Ruby

You can still purchase the Into the Wild paper pack untill August 31 here

Or, contact your Close To My Heart consultant to find out how to purchase this and the other products mentioned.

Artbooking Digital Collection-Z3503


Now, hop on over to Michelle Loncar to see her inspirational project! Be sure and visit all the Consultants at their Blogs to get some great and fun crafting ideas!
Please, leave a comment on the Blogs and let us know what you think and thank you for stopping in!


Thursday, August 1, 2019

From Me To You~August Stamp of the Month


How is everybody's summer going so far? It sounds like quite a few of the schools are starting back in session already! We had the 4 younger people last week all week but, pretty much spent it at home. Jim had an accident about three weeks ago with his Cushman and broke his leg along with a huge open wound that needs to heal so, we just enjoyed the grandkids. All the family was at our house the weekend before for our annual family camping. They decided their Dad did not need to go camping so they all came home. We spent a really nice time together in spite of the heat and humidity. Took the kids up to the lake in Warsaw one afternoon to cool off.

Apparently, I failed again to sign up for the August Stamp of the Month blog hop! So, I will share my creations anyway.

As you know every month we offer a special Stamp of the Month that you can purchase only in the month it is scheduled in. This stamp set is really a versatile one with 38 different sentiments. You can make a lot of different themed cards from this one stamp set. 


Both of these cards were made from ideas on Pinterest (PaperArtsy Blog). I used the August Stamp of the Month for the sentiments and for the card above I used the Craft On Card making stamp set for the flowers. The complementary Thin Cuts made cutting these flowers so easy! I paper pieced the leaves on the large flower and added Nuvo Crystal Drops on the centers of the tiny blue hearts. I cut the tiny tag with the tag Thin Cuts.


Both cards are made using the color scheme and papers from the Craft On paper pack. This card I used the three flower cuts from a Cricut Cartridge but I don't know which one because I had it saved from another project. The center of the flower was cut from two different sizes of the same cut. I wrinkled them and pinched the leaves to make them stand up.
I used my makeup brushes to blend colors on the big flower using the colors of Rasberry, Pixie and Canary. I used the Pixie and Sapphire Pigment Inks on the Pewter background cardstock. I stamped with the Intense Black, and the White Daisy Permanent Ink. I used the Stamp set from the Flower Market Cricut Cartridge set Playful Patterns. The circles are from a retired stamp set. The stem and doodling was done with the journal pen and a white gel pen. 


GPCT 10 Pieces Professional [High Quality] Soft [Oval-Shaped] Vegan Makeup Brushes Set- Foundation Powder/Blush Brush/Eye Shadow/Concealer/Lip/Eyeliner Toothbrush Curve Tools- Face/Eyes (Black/Gold)
These are wonderful for blending colors on your paper. I purchased them from Amazon. 


Craft On Paper Packet
Craft On Paper Pack


Monday, July 15, 2019

Technique Hop - "Mix It Up!"

Image may contain: 1 person, smiling


Hey! It's another Technique Blog Hop and this time we are featuring projects made from the Mix-Ins paper pack, mixing papers from different paper packs or and mixing the Mix-Ins with a paper pack. Many different ways of using up those extra papers that are left over. This technique can also be used for any theme or project including cards, scrapbook pages, gifts and decor.

This month there will be 12 Consultants sharing their ideas on the different ways to mix your papers. We hope you enjoy their beautiful creations as you hop through.

If you have come here from Catherine Nowak you are on the right track. The blog hop is a great big circle, so you can start here and work your way all around. If you get lost along the way you'll find the complete list of participating consultants on Melissa Robinson's blog.

Follow along by clicking on the link at the end of the post on each blog to move to the next one!

Let's get started!
I wanted to make something different than cards or scrapbook pages this time so I jumped on Pinterest and found several different ideas for these.


Have you ever made and sent Loaded Envelopes! This one is made from one 12" x 12" piece of White Daisy. You can get instructions from here on Pinterest

I added several pockets for what ever you want to put in them like chocolate (a girls best friend), coffee or tea bags, scrapbooking or card making products to send to a friend. If you go to Pinterest, you will find a lot of ideas for what to put in and on these.  You can add photos if you like also.  


On the back are two flaps with little pockets and three bigger pockets on the main body of the envelope. 


One of the things that made this so easy and fun to put together is the Stickers and Chipboard from the Craft On Paper Pack I added to finish this project. I also used some of the cut outs included in the paper pack.

For the mixing I used pieces from the Craft On paper pack, the Mix-In paper pack, and from the True Love paper pack. It's really a fun challenge and easy to do. 

First, I used our How To Book: Love of Color to get some ideas. I knew I wanted to use the Craft On paper pack as the main theme but, needed a little help with color choice to add to it. 
product image
This is a great tool and one of my favorite How To Books of all our How To books. If you noticed in the Idea Books, on the first introduction page for each paper pack at the bottom is a list of the colors used in each paper pack. The next page is the photos of each patterned paper. Of course, it is better to grab them out of the package and lay them out side by side to get a full real life view. But, this will give you an overview. The list of colors helps you know which one is which.


I chose the Craft On paper pack as the base for my color scheme, the colors I used were the Carolina stripes, small flower background, the solid rasberry (even though it has crosses I consider it more solid). I wanted a Sapphire so I used the solid Sapphire from the True Love. It has a slight design also. To add some texture and a little accent, I used the Black and White heart design and the solid Ballerina with the white flowers for the background. Then, just mix and match. Hope this makes sense. 

Now "Hop"on over to Michelle to see her works of art! Be sure to visit all the Consultants at their Blogs to get some great and fun crafting ideas! Contact your CTMH Consultant (Click Here) to get the products I used for this project!


Leave a comment on each blog and let us know what you think also. Have fun Hopping!


Wednesday, July 3, 2019

Bear Hugs July Stamp of the Month- Day 2

Bitmoji Image

Here is another project I made with this adorable July Stamp of the Month! Click on the link for the instructions and kudos to Pam Callaghan for her project.


Ideas For Scrapbookers


All product used is Close To My Heart except the Post It Notes.

I decorated a little 3 x 3" Post It Note Cover. This would make a really cute gift for a Mom or friends whether they are moms to human kids or fur babies.

The background is sponged with the Bluebird and the Carolina stamp pad colors on a piece of Water Color Paper. I used a stencil and sponged dots on the background and then added some lighter blue over that. I sprayed one squirt of water on the whole thing and it made the wonderful water marks to finish. Stamped the hearts with the Intense Black stamp pad.


I stamped the bear with the Expresso Ink Pad and added darks and lights with the Shin Hahn alcohol markers and gel pens. Stamp the flowers with the Intense Black Ink Pad and used the Shin Hahn alcohol markers to color them in. The sentiment is stamped on the banner and both I used the Expresso Ink Pad. 

Have fun with this and show us on my Facebook page what yours looks like.